Montaż domu prefabrykowanego

Prefabricated and Modular Homes – What Are They and How Are They Made [2025]

What are prefabricated and modular homes?

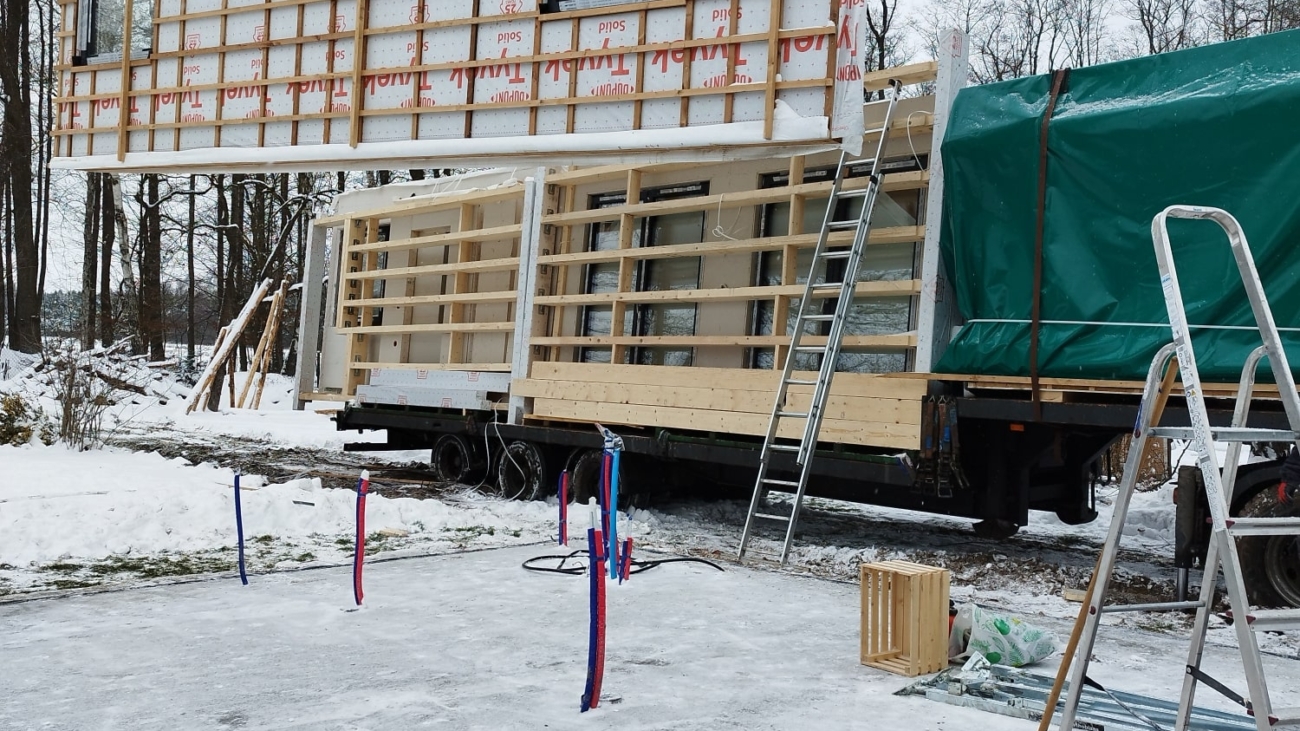
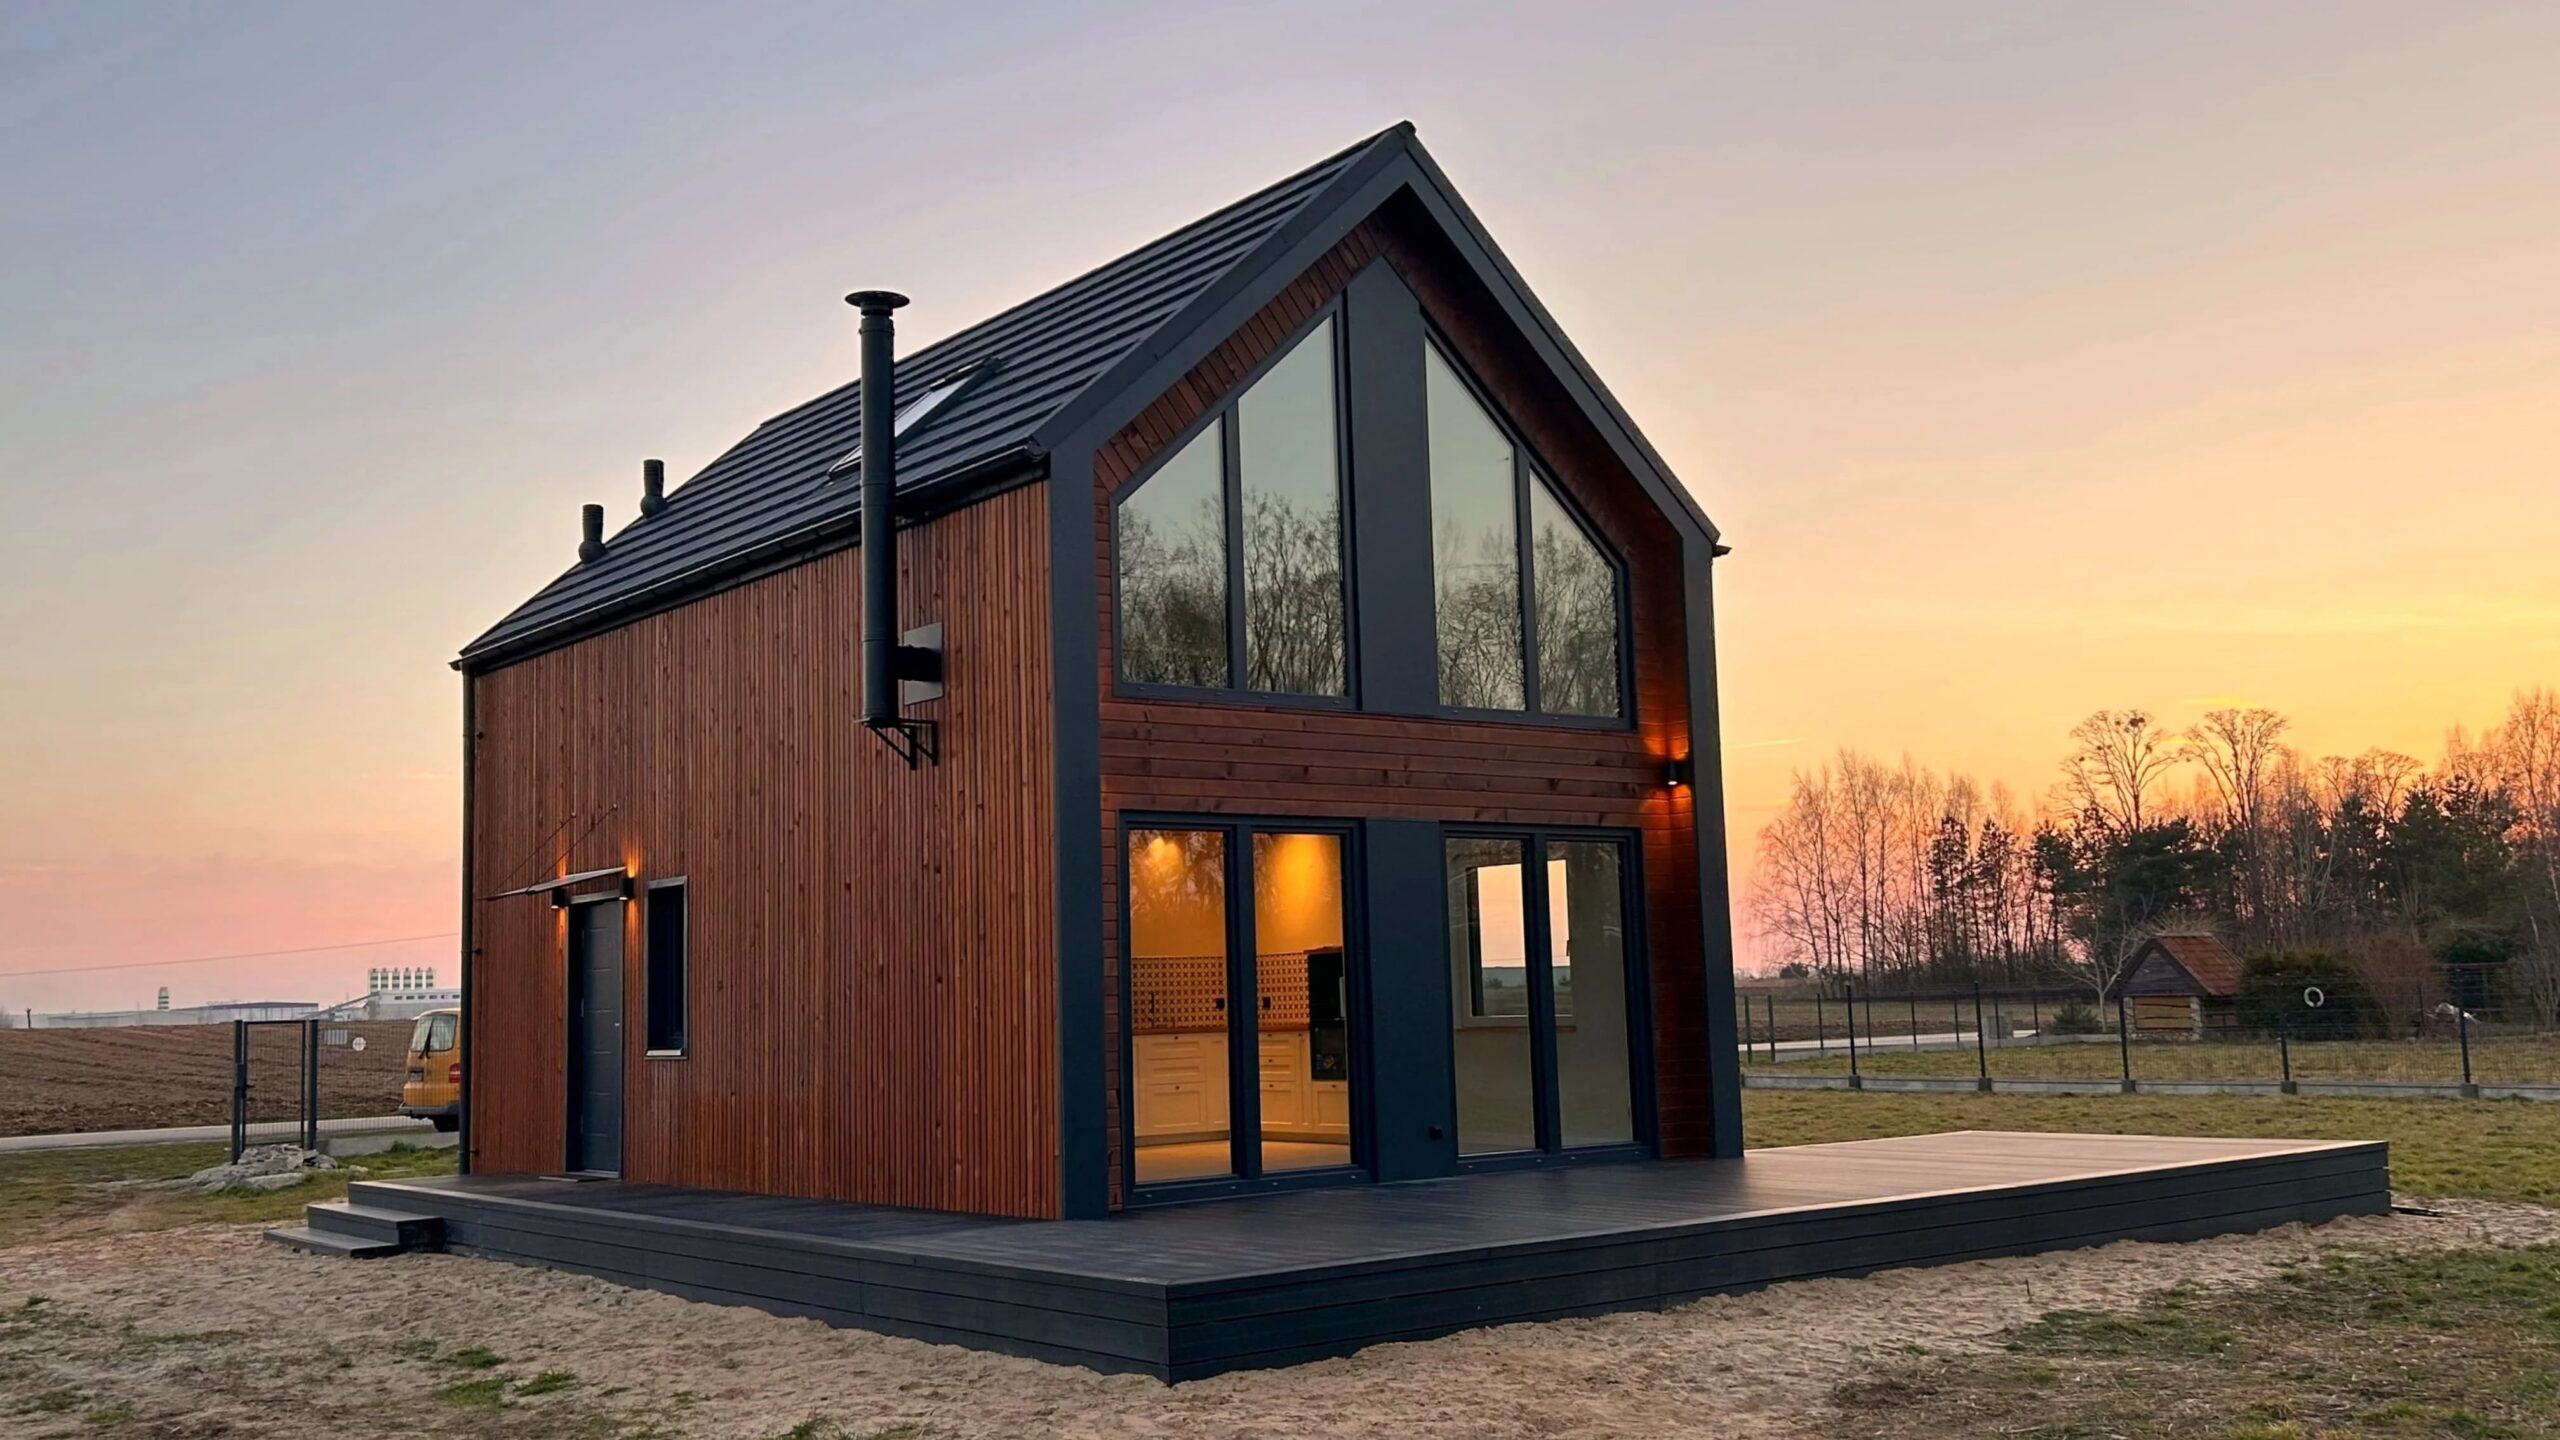
Both prefabricated and modular homes are constructions manufactured in enclosed conditions – in a production hall. In the case of prefabricated homes, building elements such as walls, roofs, and sometimes even floors are produced in the manufacturing plant. A fully prefabricated unit may already include installed windows, electrical systems, and finished interior walls at the production stage. The ready-made elements in the form of panels are then transported to the target plot, where the components of the house are assembled. Erecting the building usually takes no longer than 1–2 working days. Examples of prefabricated constructions can be found in our home offer.

Modular homes, like prefabricated ones, are produced in a production hall. However, these buildings leave the factory as complete “boxes” – modules, where each module includes connected walls, roof, and floor. A module may be a standalone building or a component of a multi-module building.

Dom prefabrykowany

How are prefabricated and modular homes built?

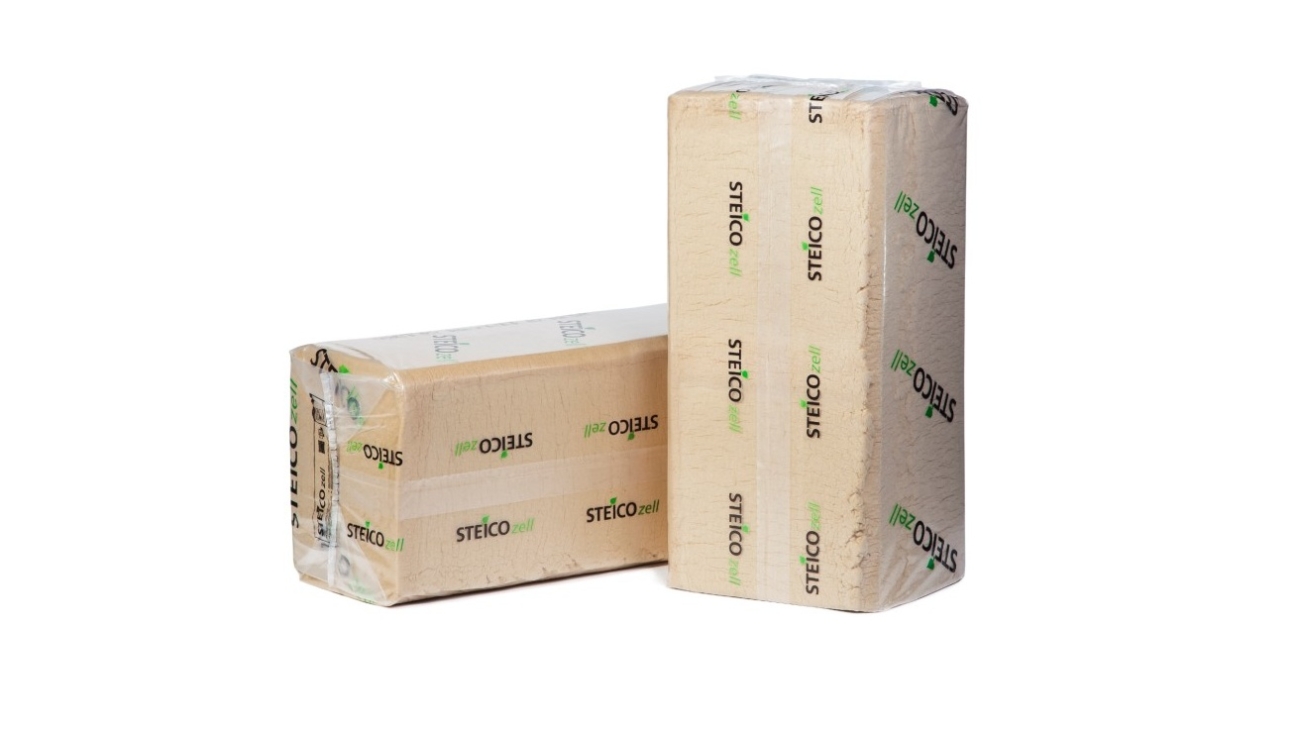
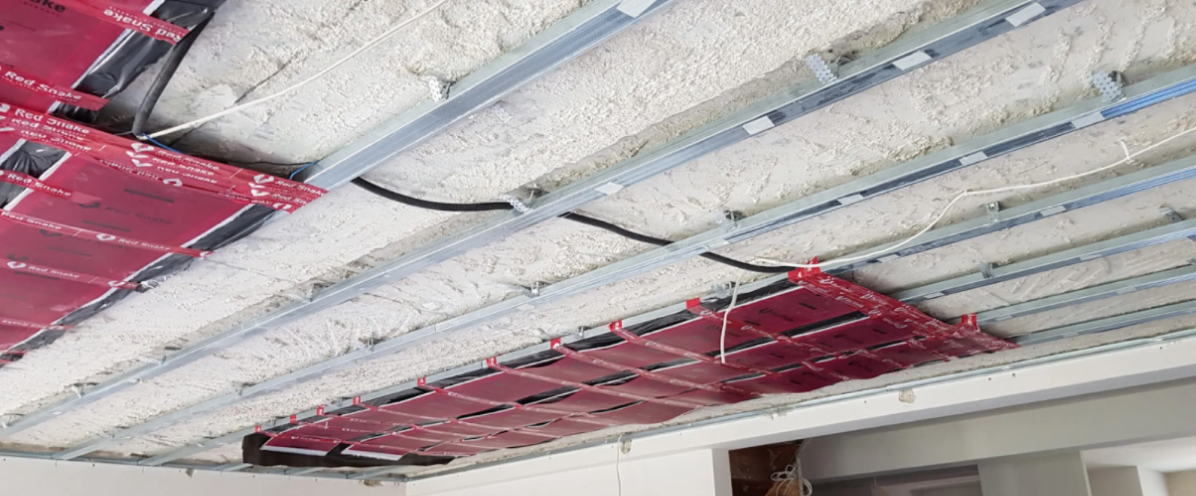
Prefabricated homes are most commonly constructed using timber-frame or expanded clay aggregate technology. Modular homes are often based on a steel frame or timber, like prefabricated homes. Loading and unloading entire modules requires a uniform, rigid structure. A house built using a timber frame is filled with mineral, rock, or wood fiber wool.

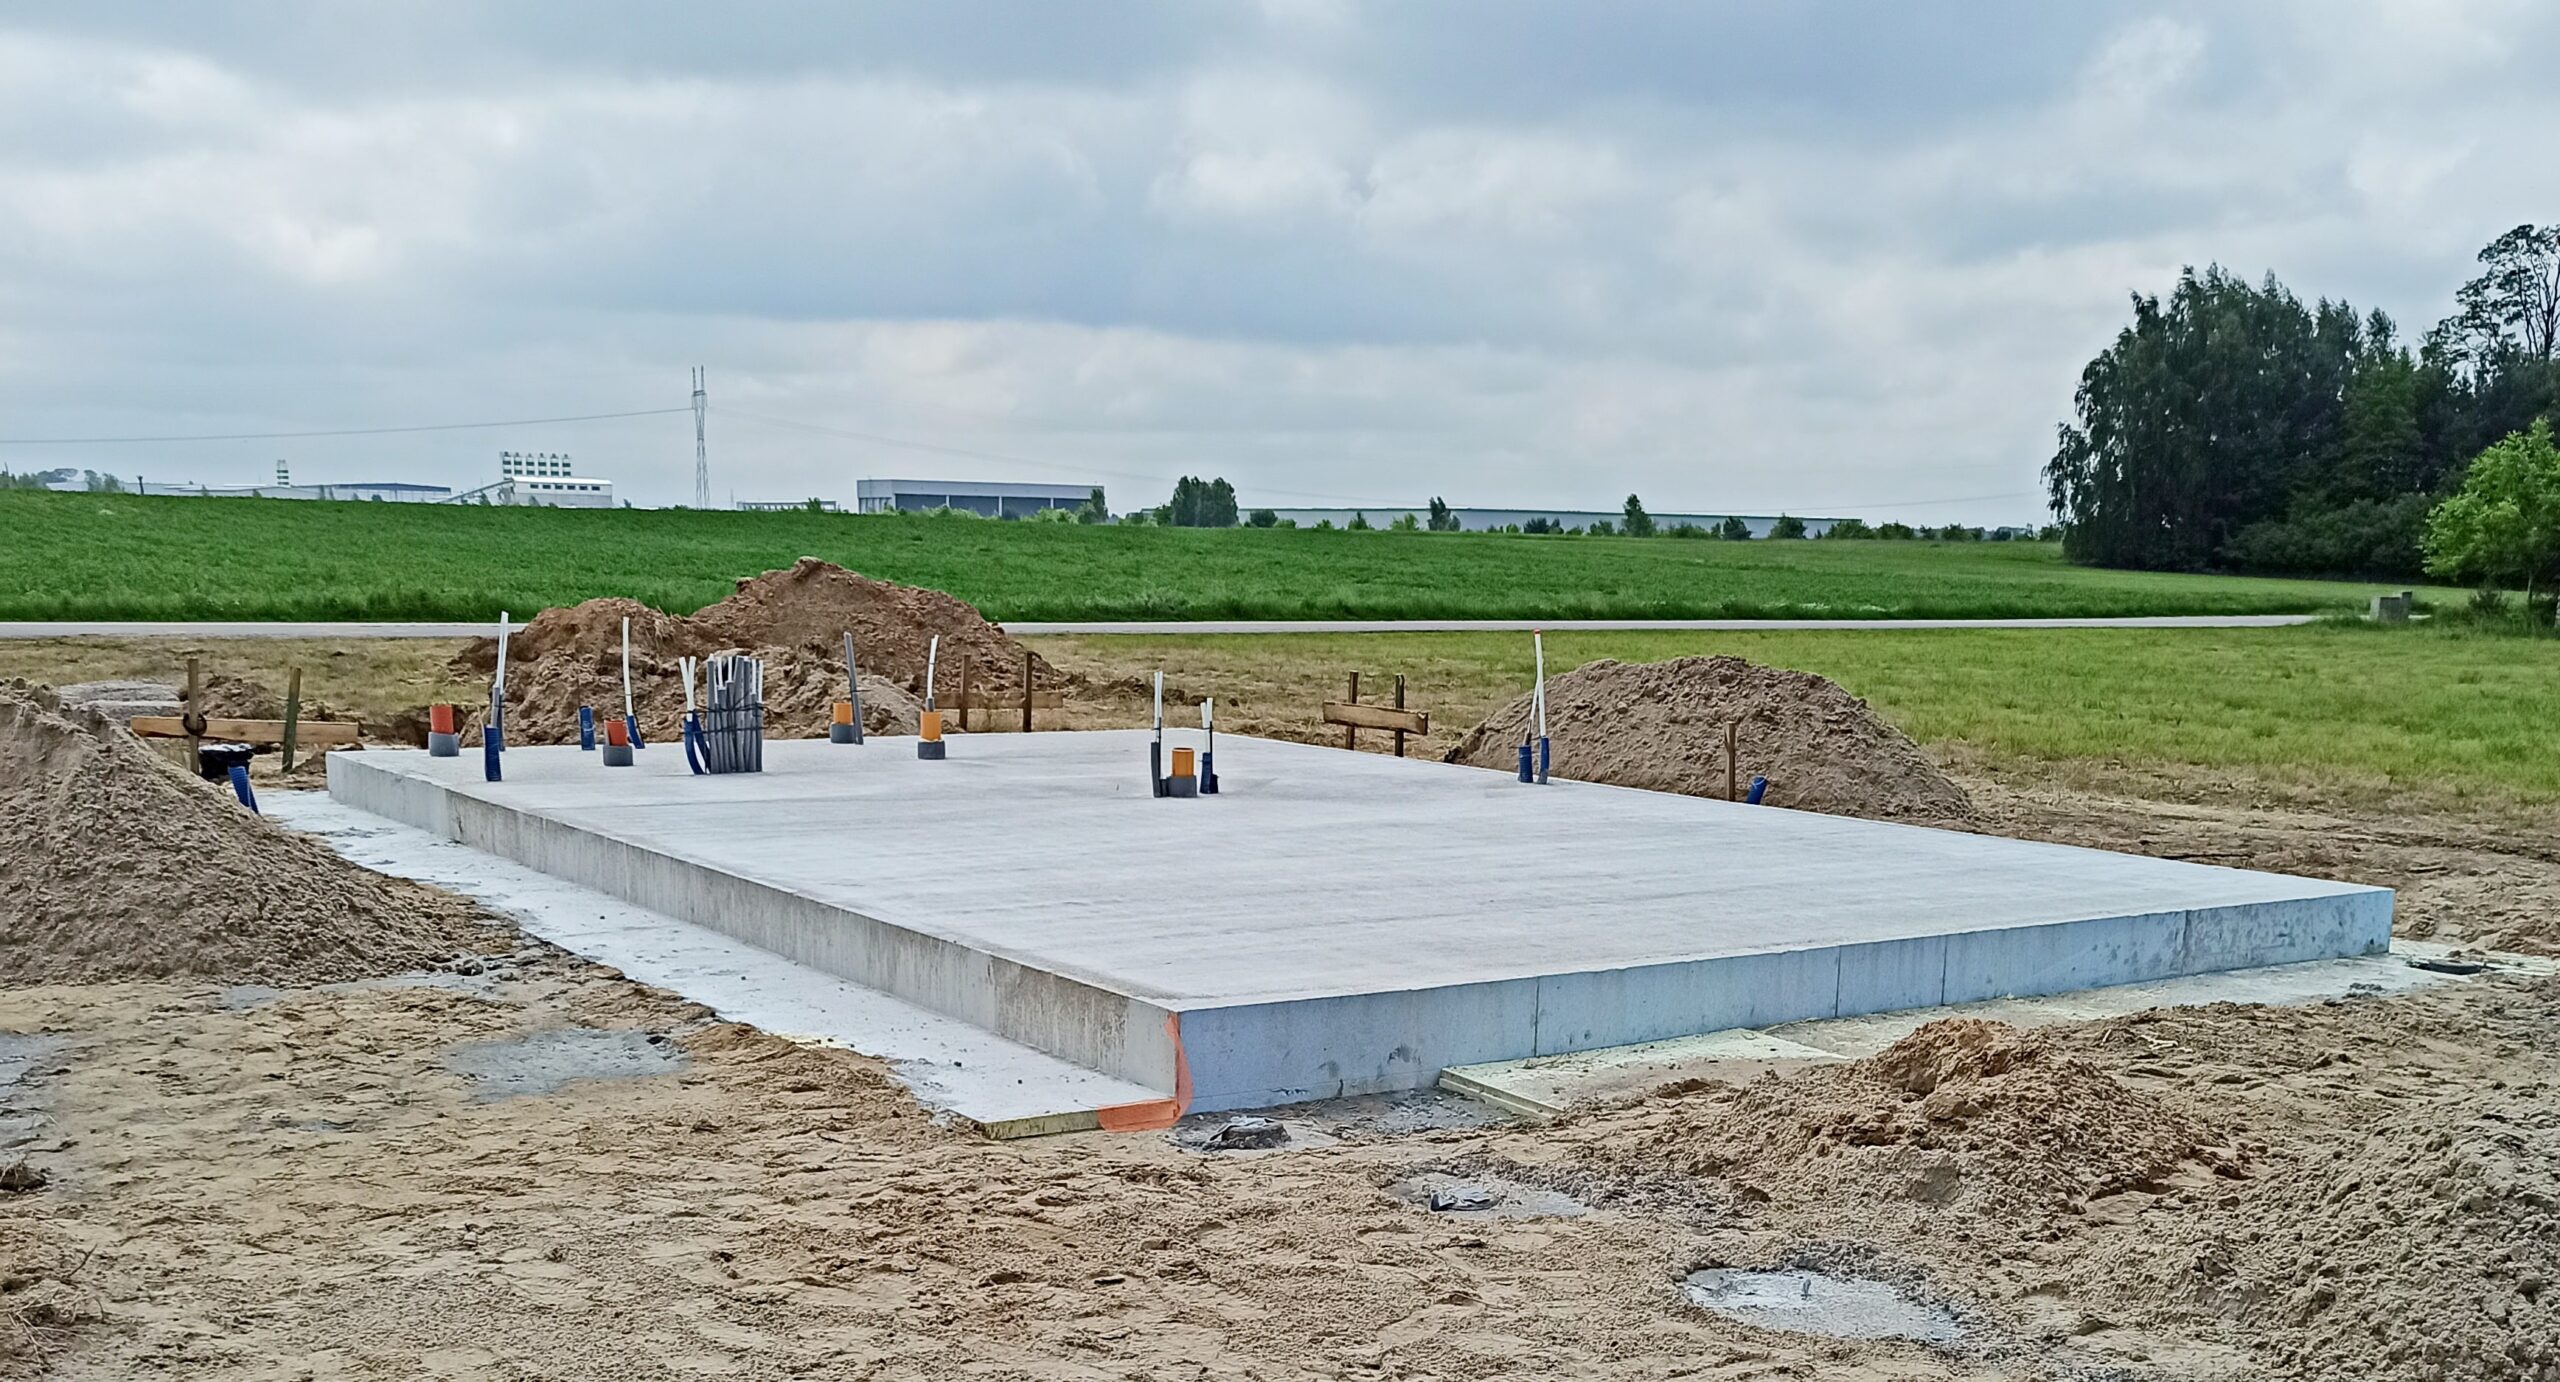
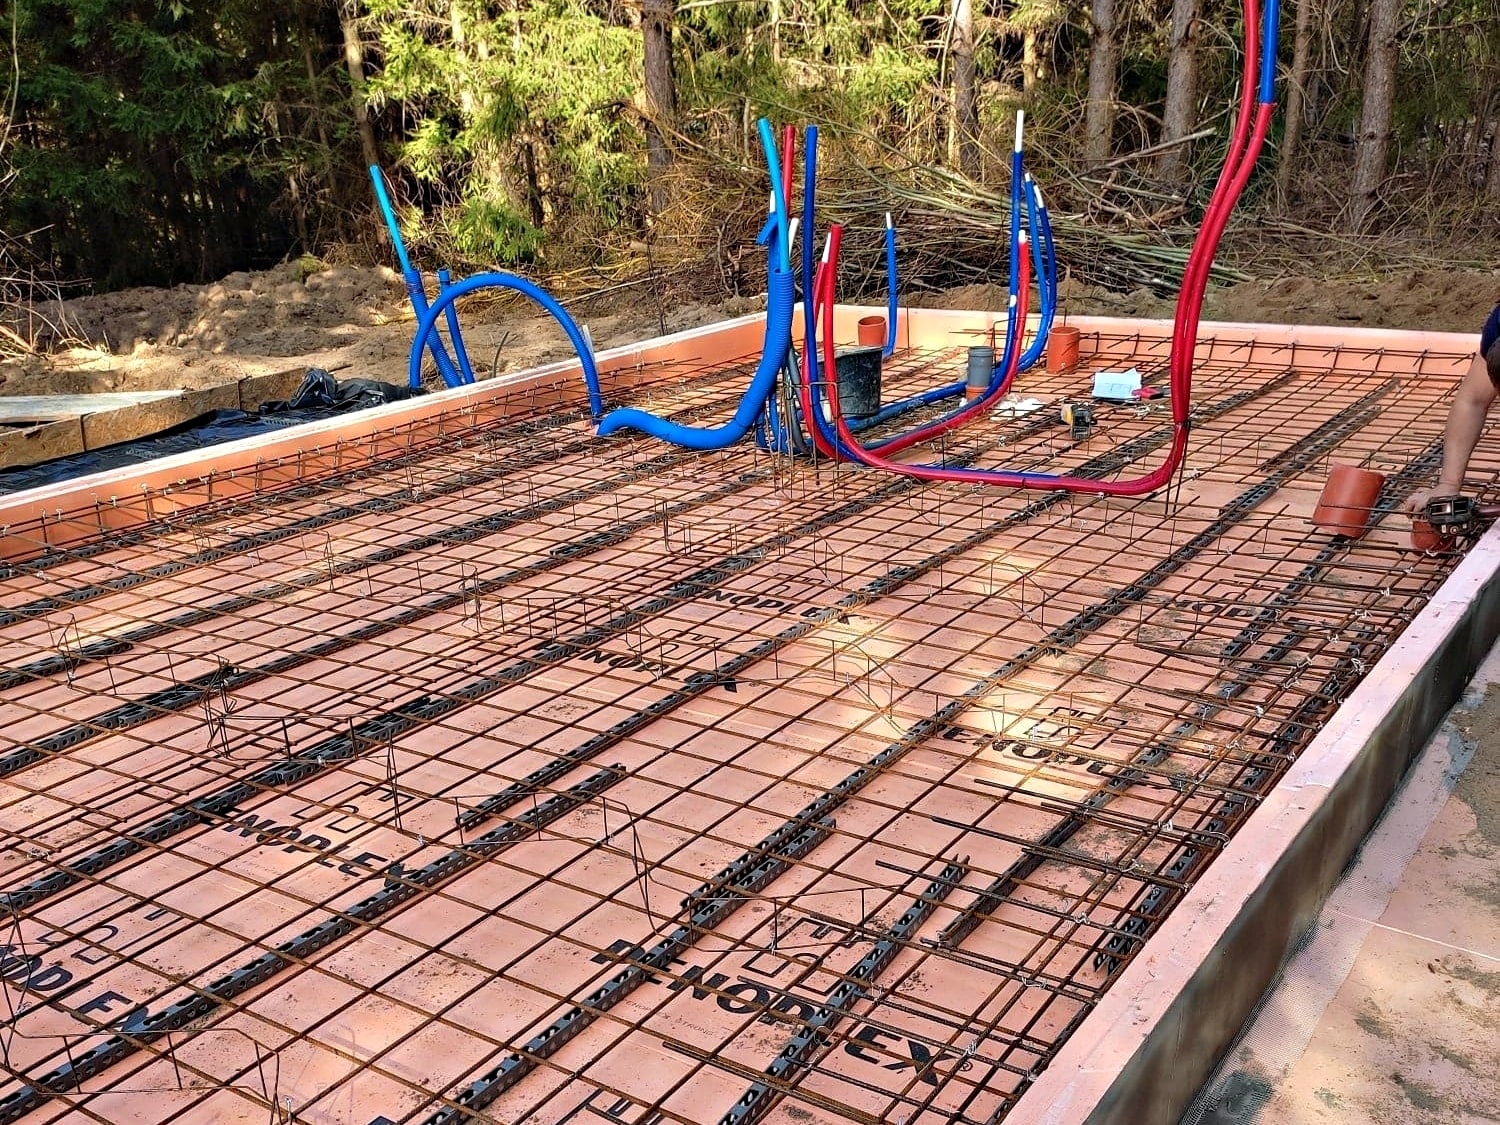
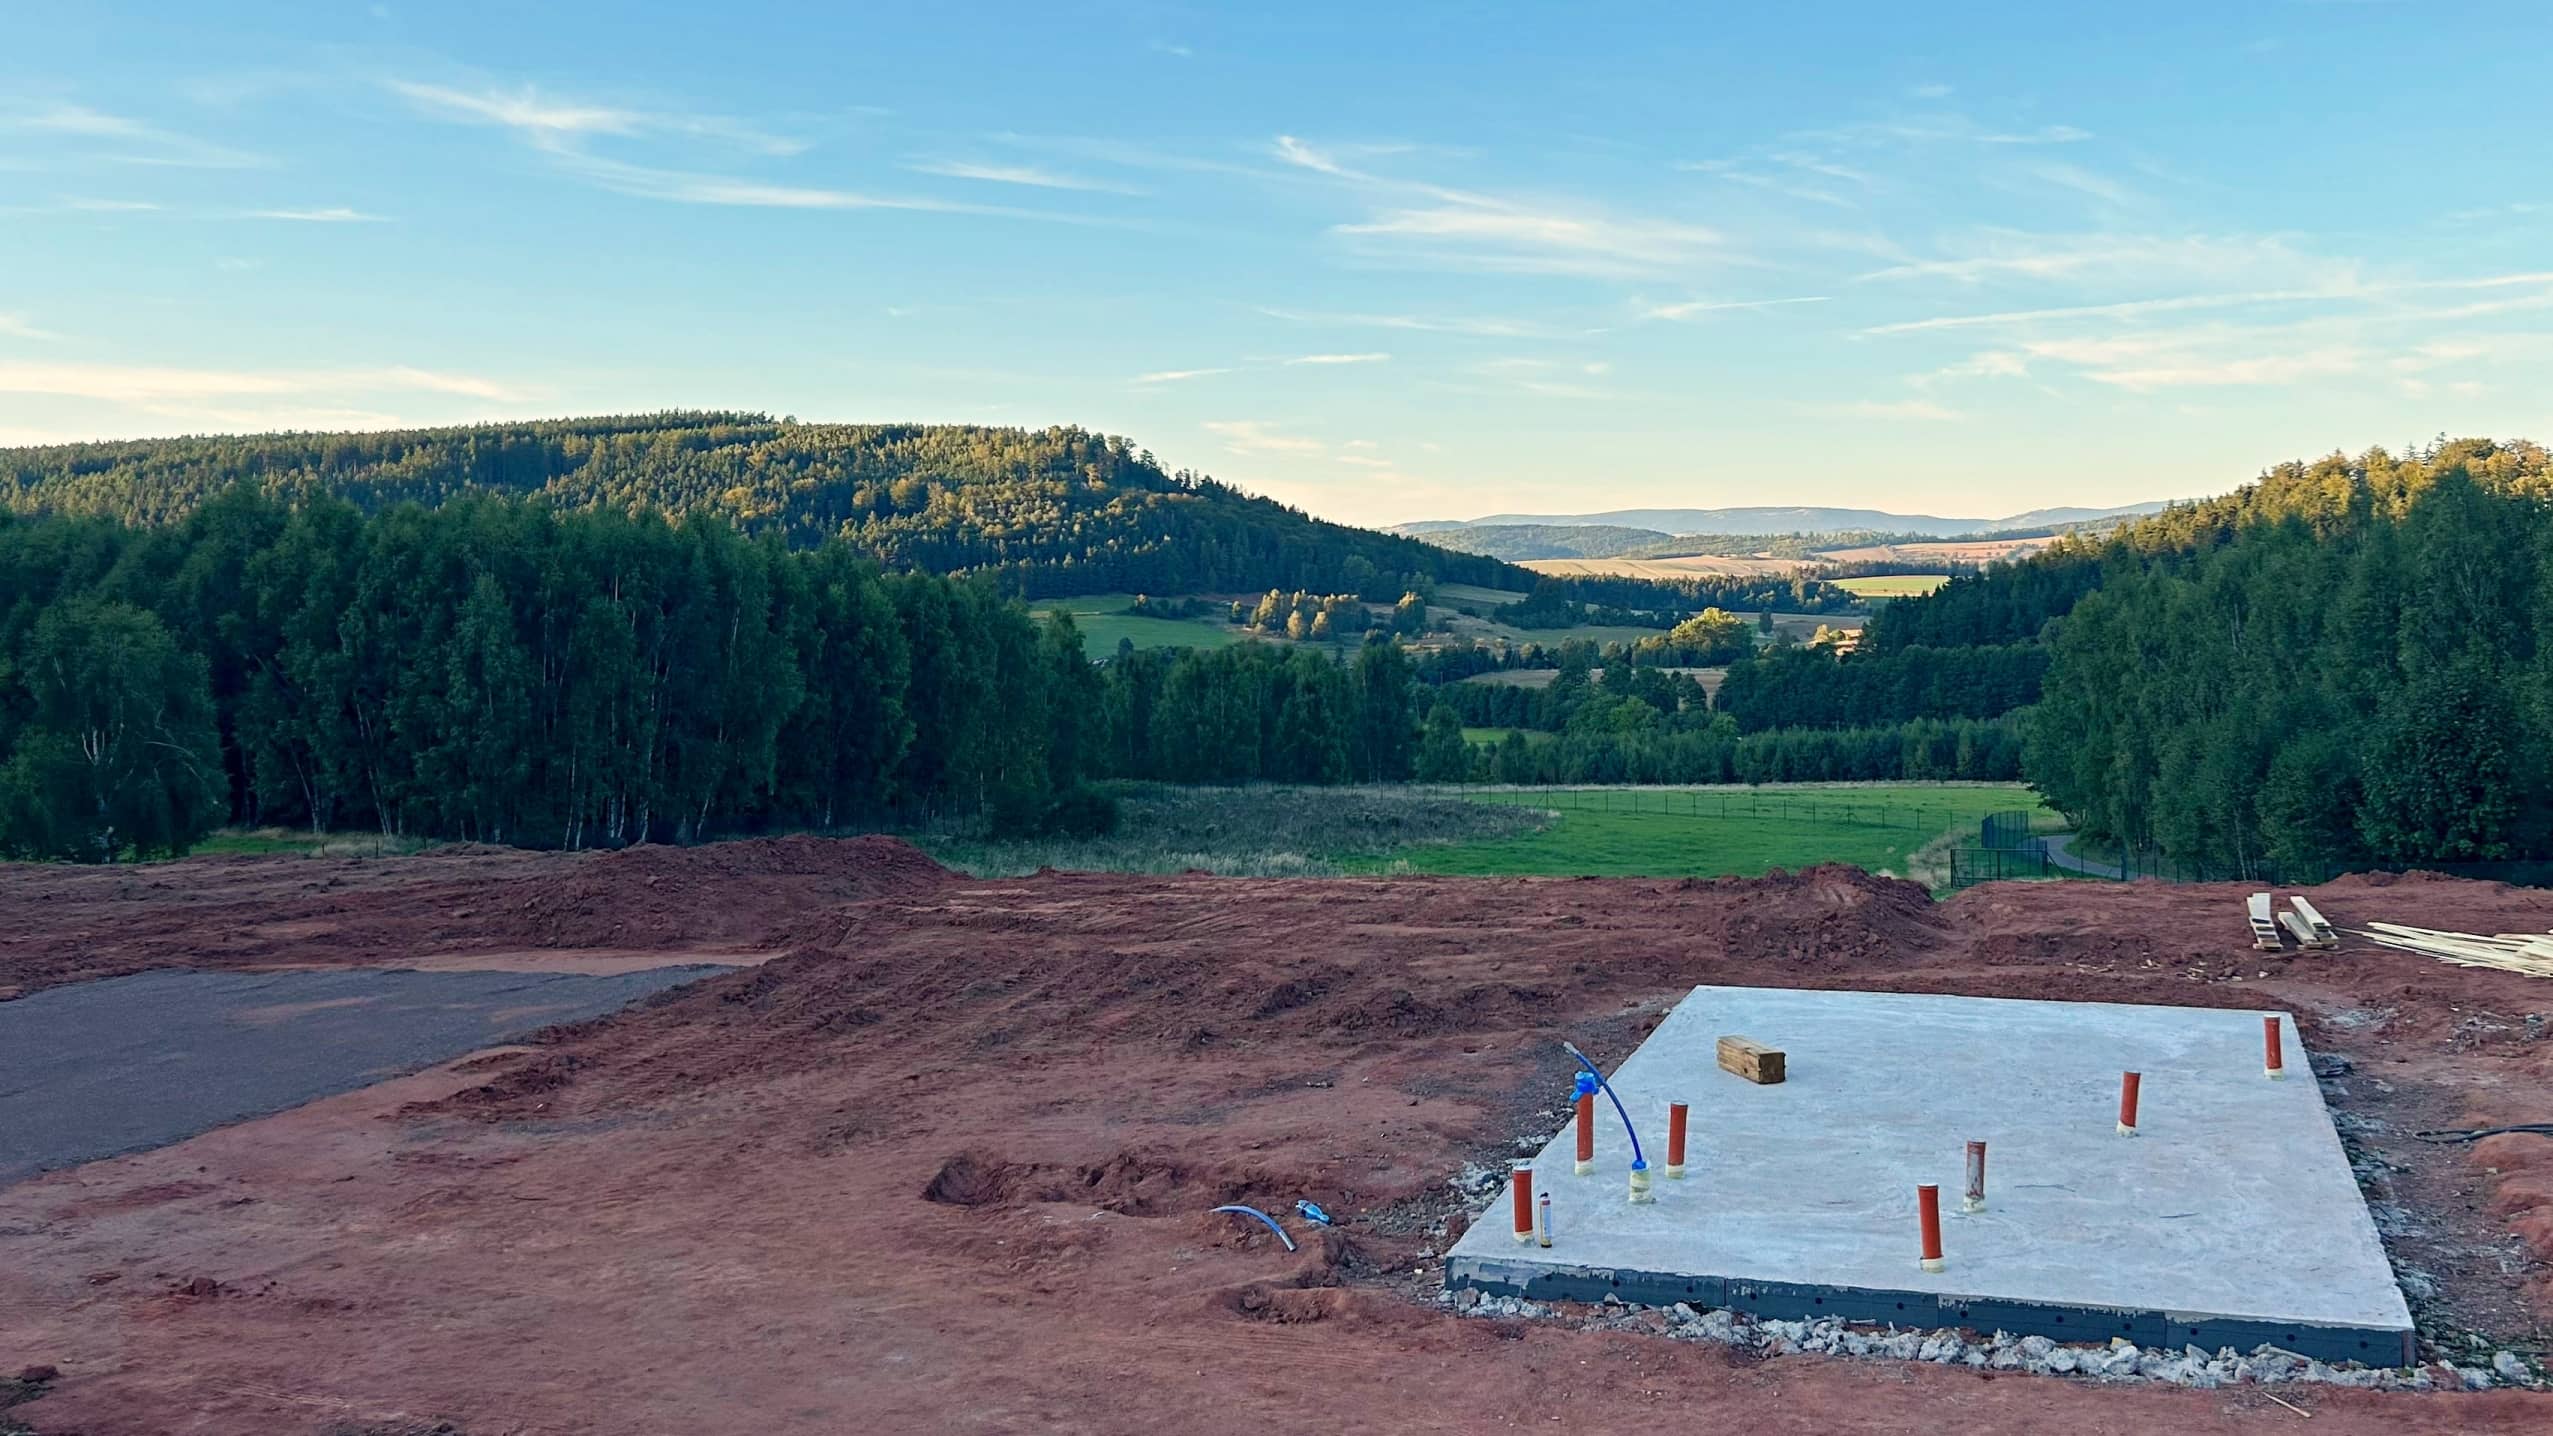
Regardless of the chosen construction method, the house must first be fully designed. Prefabrication allows no room for error—once production begins, changes are usually not possible. All components must perfectly match the pre-designed foundation, so dimensions, installations, and every construction element must remain fixed during production. After the foundation is prepared and the house is produced, the only task left is assembling all components on the site.

The assembly of a modular home takes about the same amount of time as a prefabricated one. However, modular buildings may be more advanced in terms of finishing. Modules can also be combined to build larger structures such as spacious homes or office buildings. Modular constructions, however, have very limited shapes and forms due to transportation constraints. Therefore, modular buildings are usually cubes with flat or mono-pitched roofs.

Looking for a ready-made prefabricated house design?

Download our free catalog.

Download the full offer.

Stay in touch and download our catalog containing all our designs with detailed pricing.

Dom prefabrykowany - Rest House 87:12

Is the price of a prefabricated house higher than traditional construction?

In catalog terms, probably yes. In reality, not at all. During traditional, “wet” house construction, the burden of planning, supervision, and almost daily participation falls on us. These projects often last up to a year. Using various subcontractors almost always leads to unplanned design changes, difficulties in supervising multiple parties, and issues arising from changing weather conditions. This results in higher final costs, project delays, and wasted time, stress, and potential execution errors.

With prefabricated homes, the final price is known upfront. All operational issues disappear. If the house is to go into production, it must be fully designed in advance. No changes are possible afterward. This is why most companies offering this technology have ready-made, proven projects. The contractor knows exactly how the construction will proceed. The investor doesn’t need to supervise the site daily, worry whether the crew showed up, or pay extra for solutions not included in the initial quote.

In the end, the price of a prefabricated house often does not differ drastically from houses built using traditional methods.

Dom prefabrykowany - Rest House 87:13

When to choose a ready-made design and when to create your own?

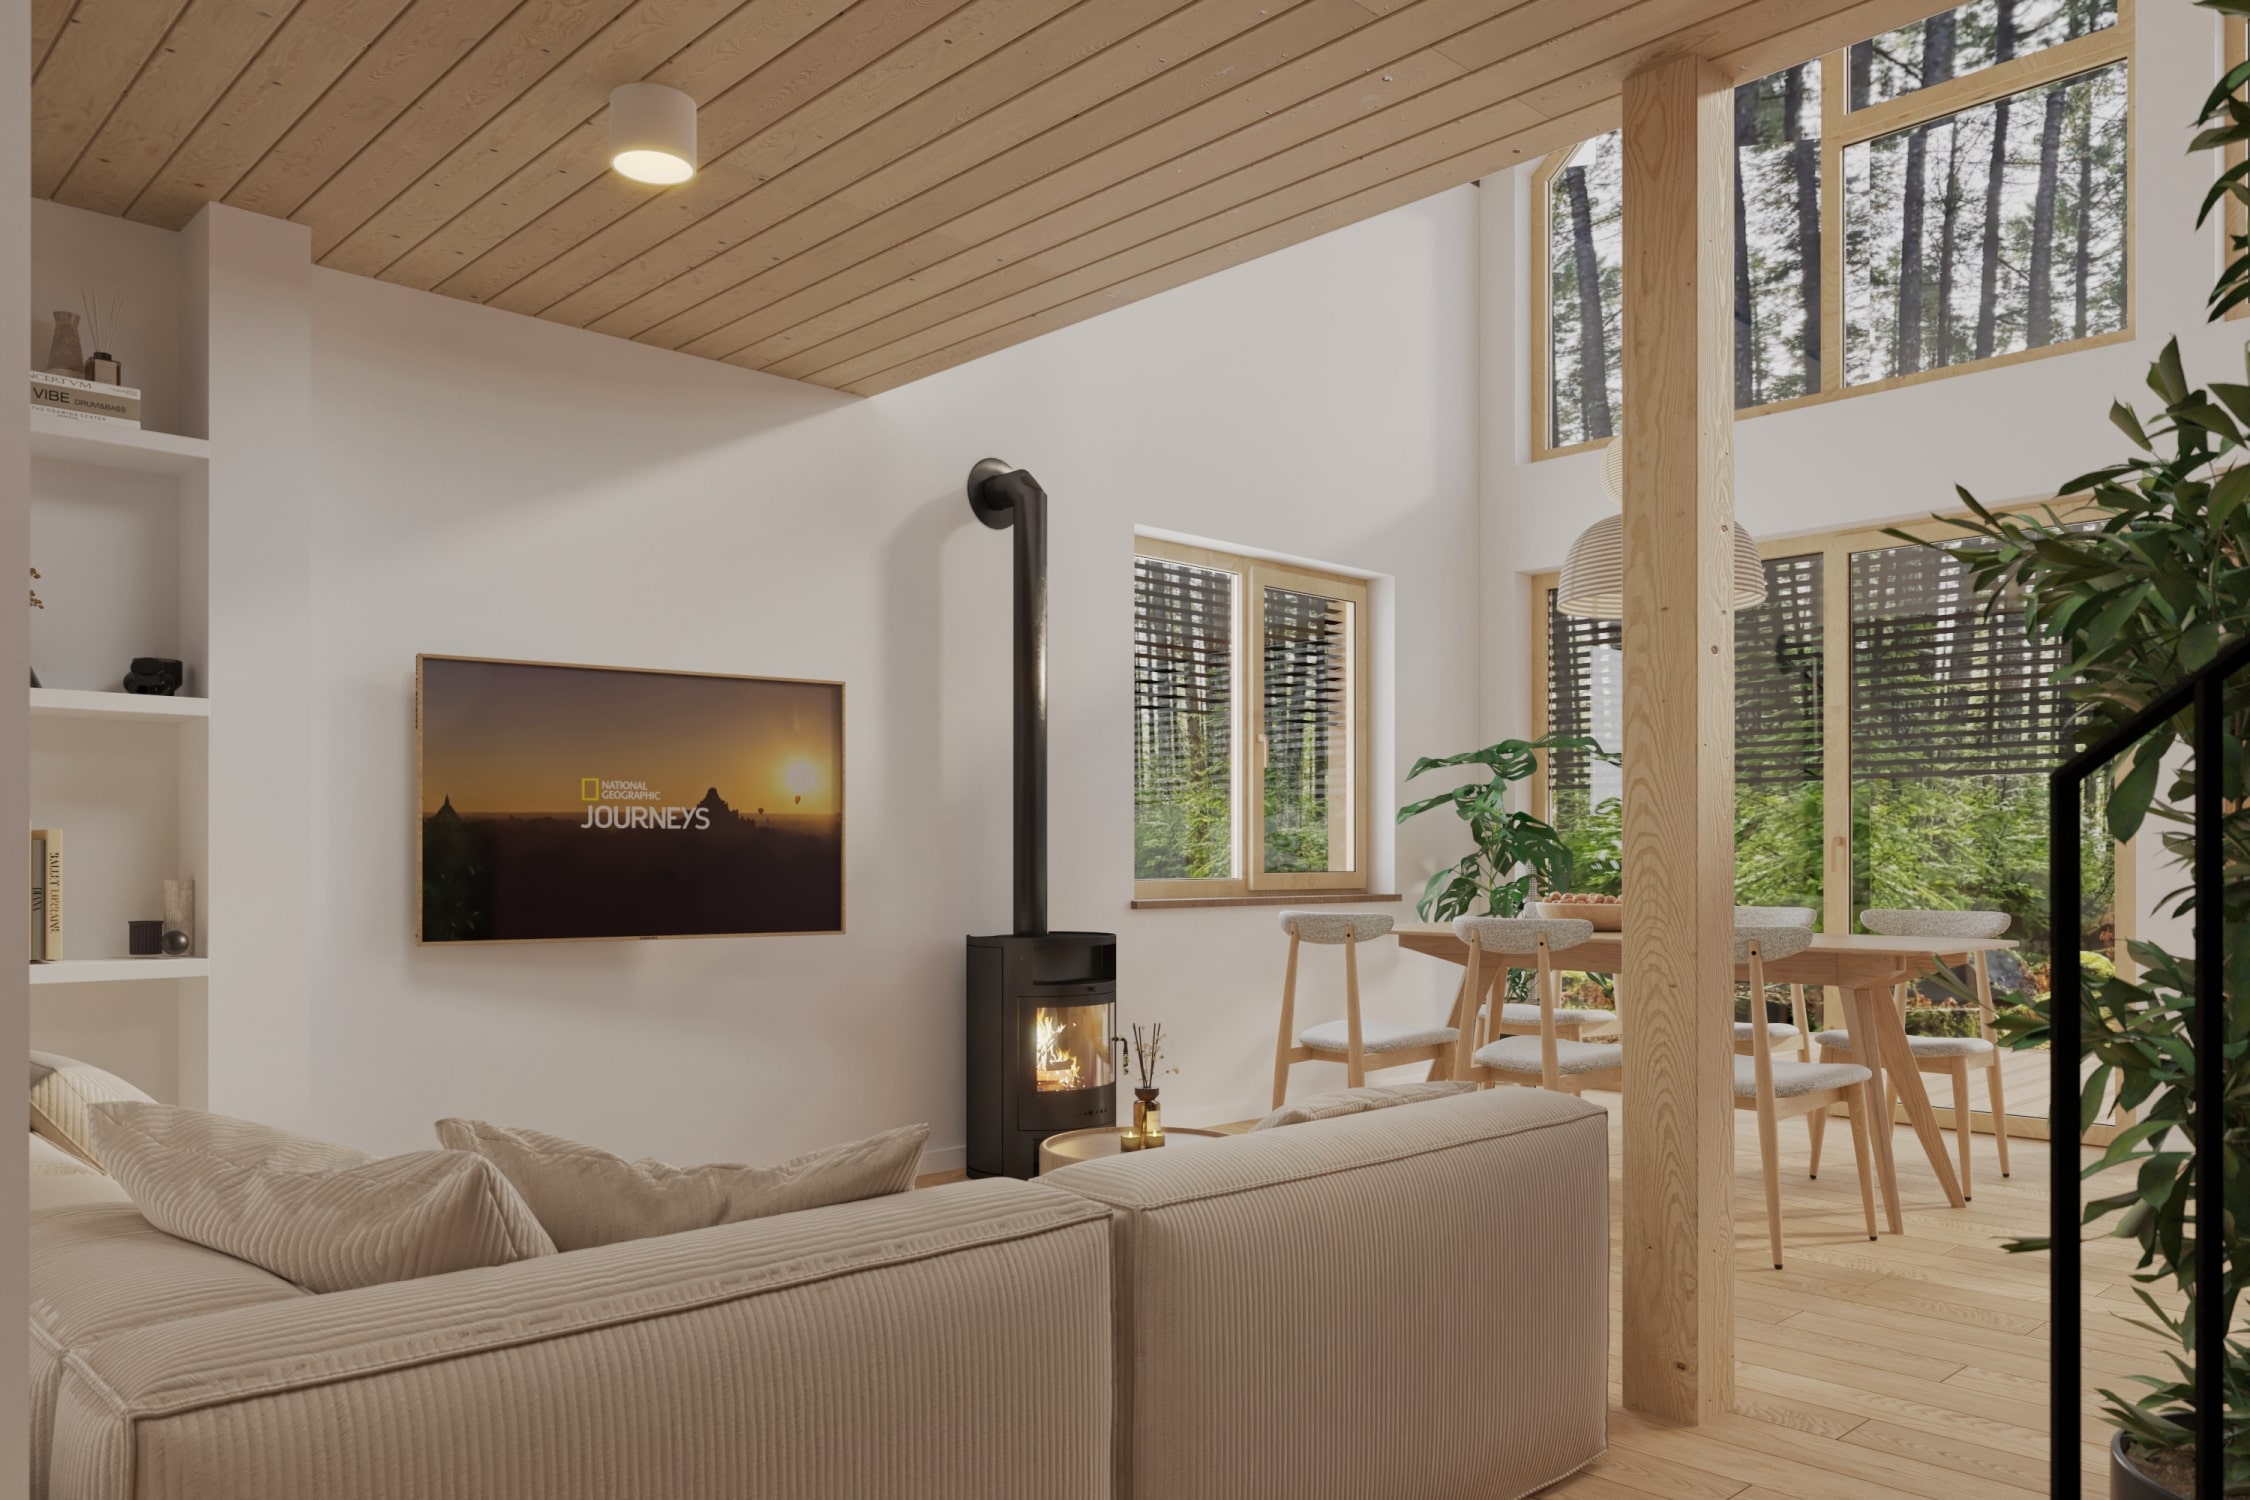
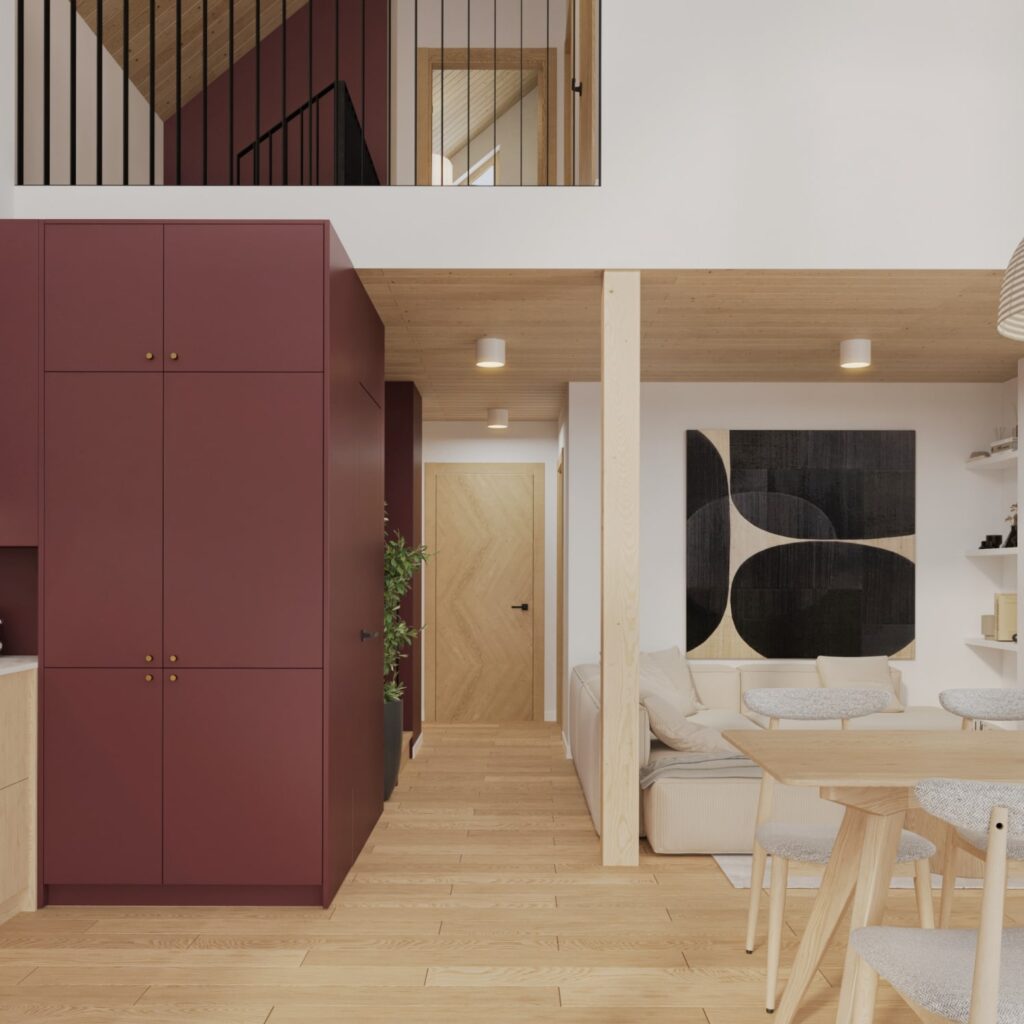
Choosing a contractor’s ready-made design guarantees that the building has already been constructed several times, and the design has been refined based on past experience. Most often, one can already see what the house looks like in reality and assess whether it meets expectations. This greatly simplifies the decision-making process and gives peace of mind, knowing what the final result will look like.

If you have your own concept for a house, you’ll likely find a prefab-specialized contractor willing to take on the challenge. However, preparing production for a custom one-off design will take more time and cost more.

Advantages of prefabricated homes

Thanks to production in controlled, enclosed conditions and earlier implementation of the same design, the quality of prefabricated homes is significantly higher compared to traditional homes:

  1. Very short completion time – as little as 3 months from contract signing
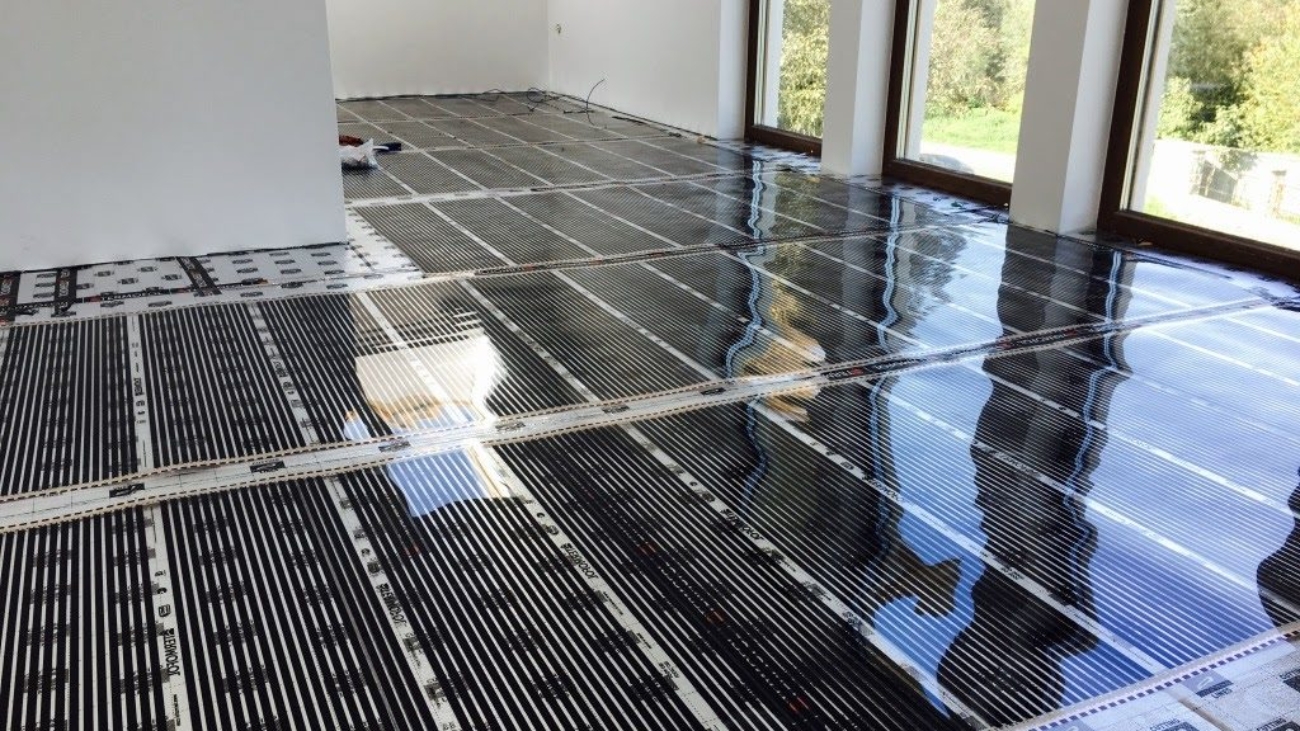
  2. Possibility to finish many interior elements during production
  3. No need for construction knowledge – the contractor provides all specialists
  4. Independence from weather conditions
  5. Each production stage is subject to strict quality control
  6. No need to hire a construction supervisor

7. No risk of material theft from the construction site Overall, you save time and avoid stress.

Disadvantages of prefabricated homes

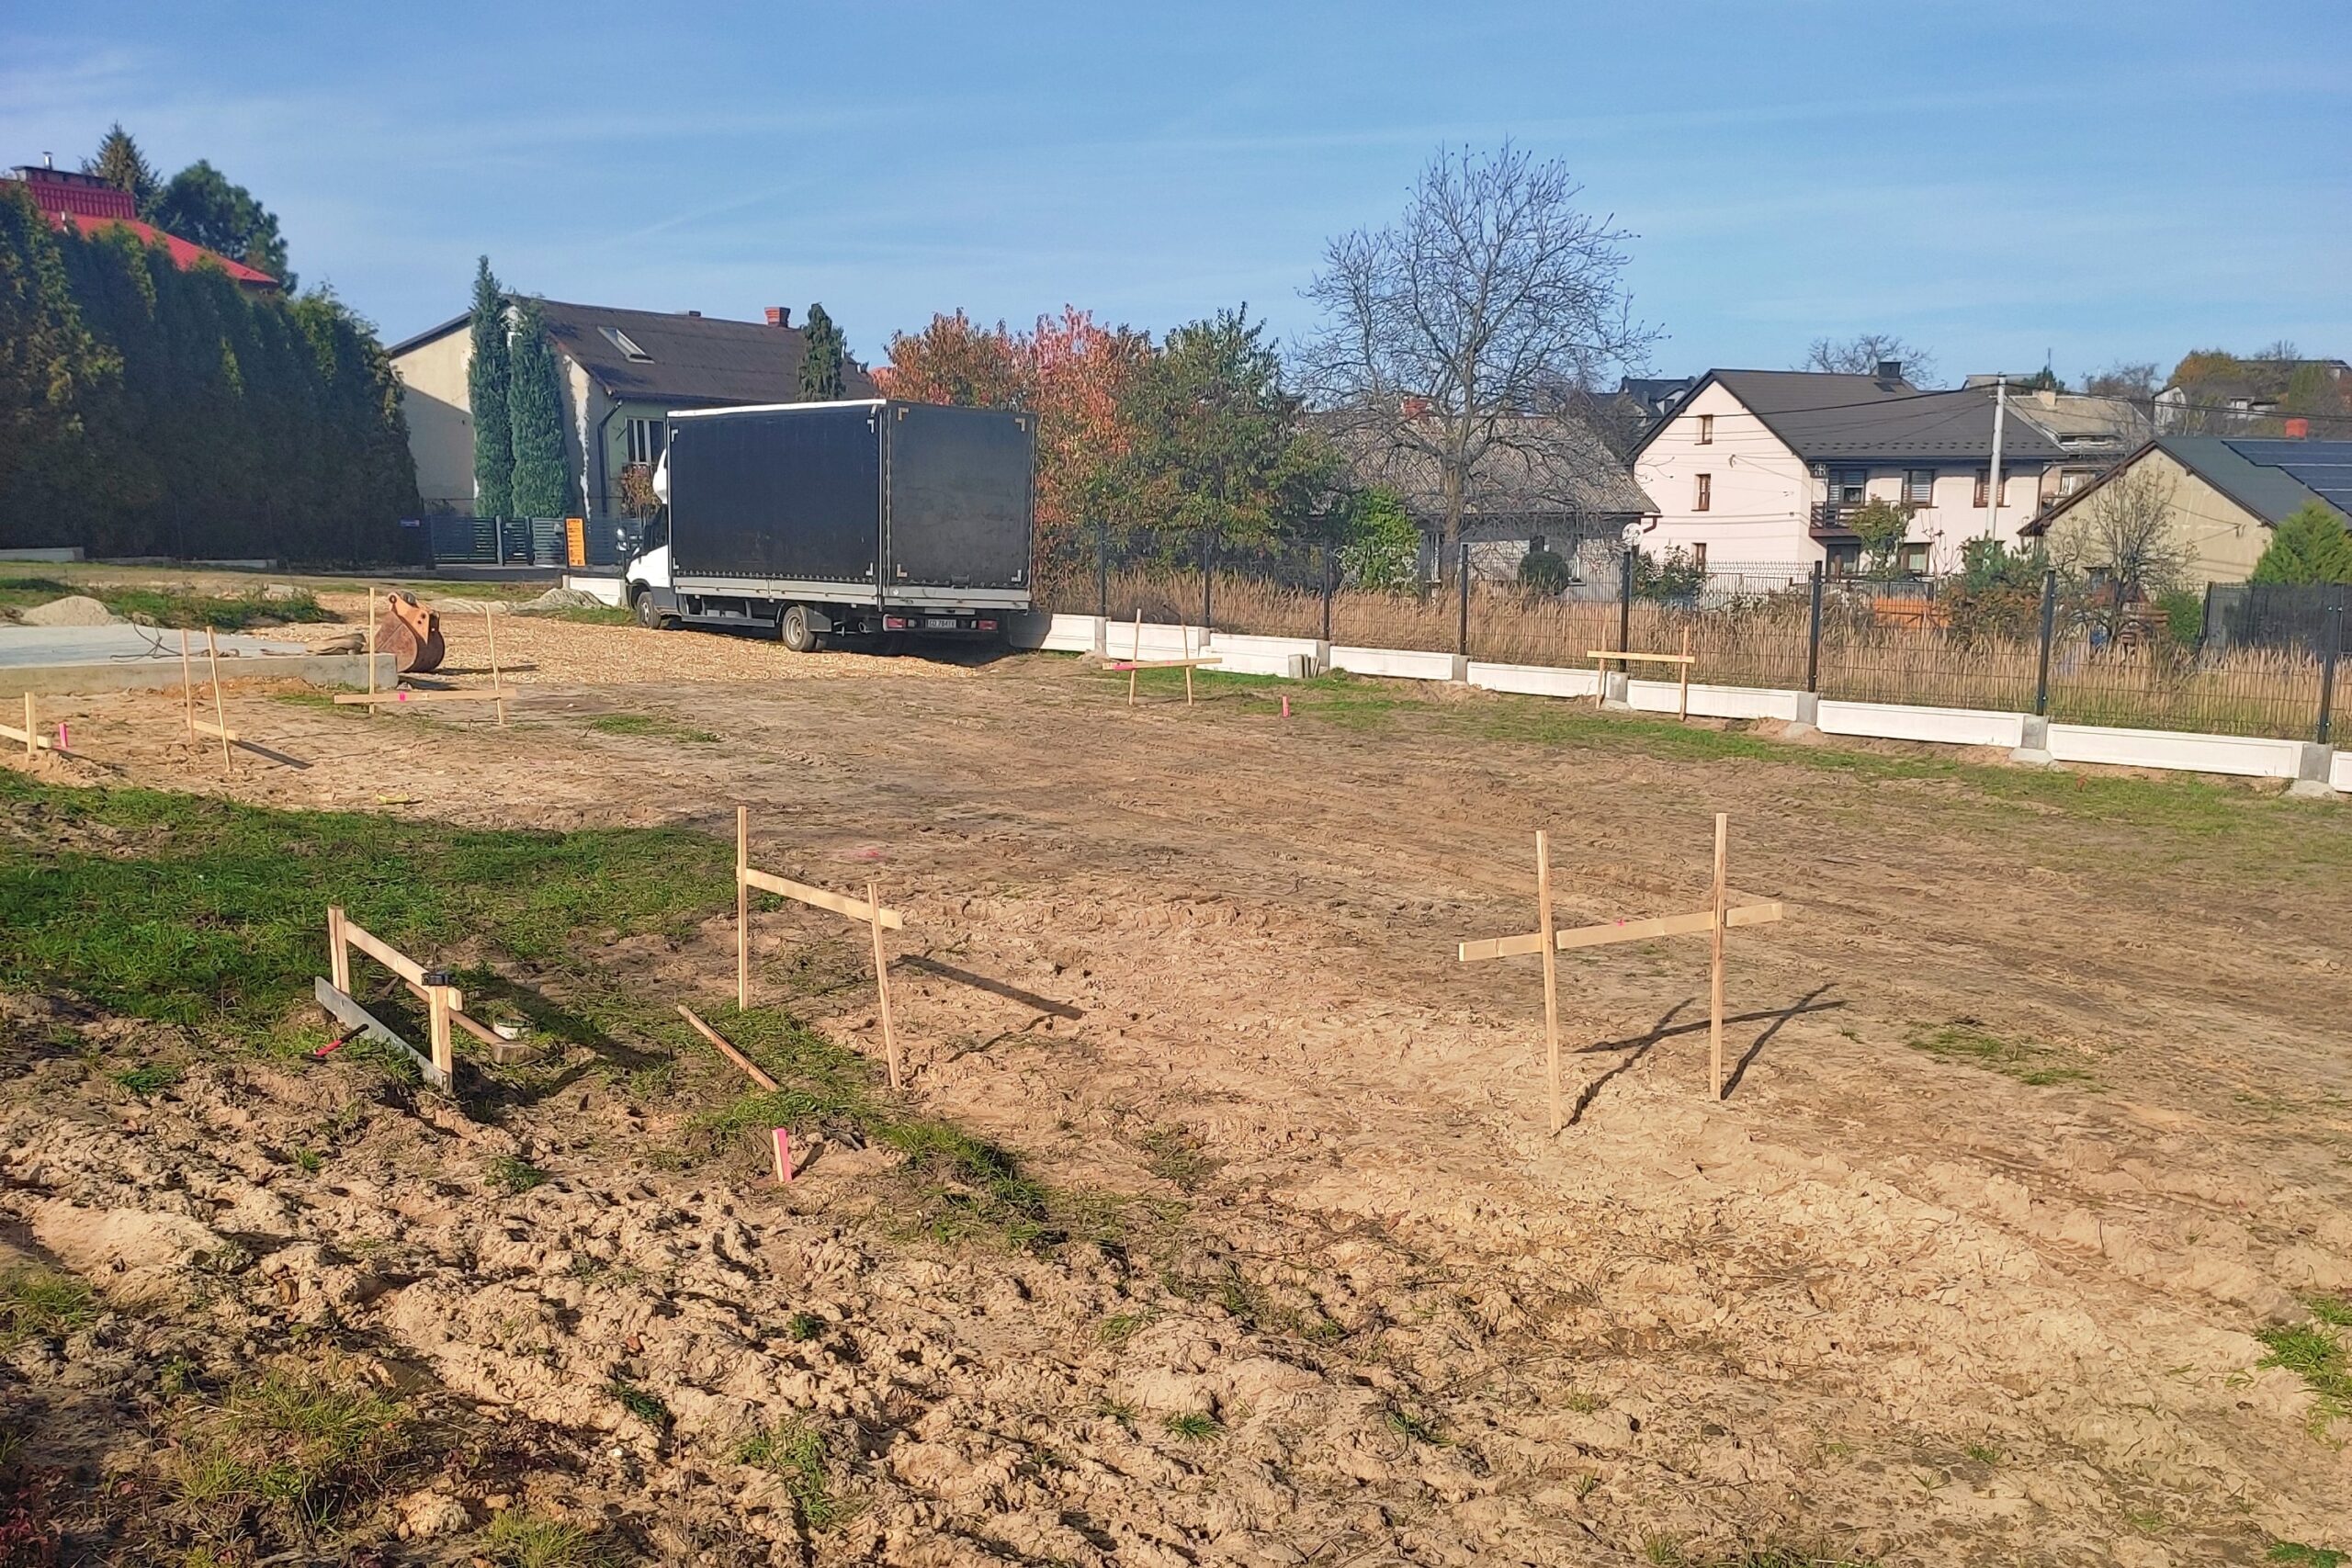
  • Ensuring proper access to the plot for heavy equipment (e.g., HDS crane truck)
  • No possibility of design changes after production starts
  • Most financing must be covered before the house is assembled on the plot

Check out our offer of prefabricated timber-frame homes.

Would you like a more detailed offer? Let us know what you’re interested in, and we’ll get back to you with a tailored solution.

Contact Us

Looking for a tailored offer? Tell us what you’re interested in, and we’ll respond with a solution.

E-MAIL

info@modularen.com

Phone

+ 48 536 838 863
+ 48 535 602 351

Address

Modularen Sp. z o.o. ul. Puławska 228/1 02-670 Warszawa

Wełna drzewna Steico Zell-

Wood Fiber Insulation by Steico – Properties, Advantages, and Disadvantages [2025]

What is wood fiber insulation?

In the simplest sense, these are wood fibers of uniform length and width, derived from fresh coniferous wood. In this article, we focus primarily on wood fiber insulation manufactured by Steico, which offers this product under the names Steico Flex and Steico Zell. From this article, you will learn about the characteristics of this material, its properties, and its method of application. We also encourage you to watch our video devoted to the subject of wood fiber insulation.

How does wood fiber differ from mineral wool?

Mineral wool has a thermal conductivity coefficient Lambda [λ] of approx. 0.036 W/(mK), or even lower, depending on the material class. The specific heat capacity of mineral wool ranges around 800–1000 [J/(kgK)].

In comparison, wood fiber insulation has a thermal conductivity Lambda [λ] of approx. 0.036–0.038 W/(mK), and a specific heat capacity of approx. 2100 [J/(kgK)].

  • What do these parameters mean? In short, the lower the Lambda [λ], the better the material retains heat. Comparing this parameter, mineral wool has a slightly better value, but the difference is not significant. These materials can therefore be considered comparable in terms of thermal conductivity.
  • When comparing specific heat capacity (also known as specific heat [Cw]), wood fiber insulation outperforms mineral wool. This parameter indicates how much thermal energy the insulation material can absorb and how long it takes to release this energy into the building. In practice, high specific heat means that the building retains heat longer in winter (walls are better protected from external frost) and stays cooler in summer (walls are better protected from external heat). In summary, a house insulated with wood fiber will retain heat longer in winter and heat up more slowly in summer.
  • Due to its high density, wood fiber is also more moisture-resistant and settles more slowly within the wall cavity compared to mineral wool. Up to 20% moisture content does not change the thermal conductivity of wood fiber. In practice, even damp wood fiber insulation can evaporate water in the summer and return to its natural structure – unlike mineral wool, which sags and forms thermal bridges. For insulation meant to last decades, this parameter is worth noting.
  • Surprisingly, wood fiber insulation is also fire-resistant. It is enriched with a natural fire retardant – ammonium sulfate. When in contact with fire, the fiber forms a char layer that prevents the spread of flames and quick burnout. On the Steico website, one can find a video comparing how wood fiber performs against other insulation materials when exposed to fire.
  • Wood fiber mats (e.g., Steico Flex) are much denser than standard mineral wool, making them better acoustic insulators. When using blown-in wood fiber (Steico Zell), the material can be compacted to levels practically unmatched by other insulation materials. The standard density for Steico Zell blown-in fiber is 45 kg/m³ for prefabricated walls. By adjusting the density during application, one can create a wall meeting even the demands of sound studios, cinemas, or playrooms.
  • The last comparison criterion is price. Unfortunately, wood fiber performs worse in this respect. When comparing wood fiber mats (e.g., Steico Flex) to mineral wool rolls, wood fiber is significantly more expensive.


What are the methods of applying wood fiber insulation?

The most common methods of applying wood fiber insulation to building elements are by inserting mats (Steico Flex) or blowing in wood fibers (Steico Zell). Mats are pre-pressed sheets of wood fiber. They can be used similarly to mineral wool – any insulation layer can be filled with either mineral or wood fiber.

Shredded wood fibers (Steico Zell) are sold in bags and compacted under high pressure into wall, ceiling, or roof cavities. While both products are of comparable quality within the same brand, the method of application significantly impacts the final insulation result.

Blowing in Steico Zell requires a powerful filling unit capable of compacting the material at high pressure. For prefabricated buildings, the average density is approx. 45 kg/m³. At this density, wood fiber meets thermal insulation standards. Given the high pressure, it is necessary to select sealing boards that are thick and rigid enough to withstand the force during application.

So which should you choose – blown-in or inserted fiber?

Blown-in fiber is becoming increasingly popular due to its precision. Precision, precision, and more precision. As building codes become stricter, exactness in thermal insulation is now crucial.

Blown-in wood fiber provides uniform filling of wall, roof, or ceiling cavities, adapting to irregularities and tightly packing around joints, cables, and structural obstacles – achieving nearly 100% cavity fill.

In summary, the quality of both Steico Flex and Steico Zell is practically identical. However, blown-in fiber offers a more airtight fill. The downside is the need for expensive equipment, application skills, and knowledge about proper building design. If these requirements are met, blown-in fiber is arguably the best insulation for timber-frame buildings today.

Advantages of wood fiber insulation

  • Lambda [λ] = 0.038 W/(mK) – low heating costs in winter
  • Heat capacity C = 2100 J/(kgK) – pleasant coolness in summer, consistent warmth in winter
  • Uniform, airtight filling – with Steico Zell blowing
  • Vapor-permeable material – long-term protection from moisture
  • Resistant to material settling within walls
  • Fire classification – flame-retardant B-s2,d0
  • Long-term quality due to the special structure of wood fibers
  • Eco-friendly product from sorted pine fibers
  • Positive impact on indoor air quality
  • Excellent acoustic insulation

Disadvantages of wood fiber insulation

  • Higher cost compared to mineral wool
  • Limited market availability
  • For blowing: requires expensive equipment, application skills, and design knowledge for this type of insulation

Use of wood fiber insulation in Modularen

During the production of our houses, we offer clients the option to choose between mineral wool or (for an additional fee) Steico Zell blown-in wood fiber insulation. The full range of homes we build, along with a list of materials used, is available in the “prefabricated timber-frame houses” section on our website.

Contact Us

Looking for a tailored offer? Tell us what you’re interested in, and we’ll respond with a solution.

E-MAIL

info@modularen.com

Phone

+ 48 536 838 863
+ 48 535 602 351

Address

Modularen Sp. z o.o. ul. Puławska 228/1 02-670 Warszawa

Prefabrykowane wiązary dachowe - realizacja mazowieckie 3

Roof Trusses – Is It Worth Using Them? [2025]

What are roof trusses?

Roof trusses are the main load-bearing element of the roof structure. Their primary function is to transfer the load between the roof and the building walls. Practically every building with at least a gable roof requires the use of either a roof framework or roof trusses. 

The main structural components of trusses are the upper chord, lower chord, as well as vertical and diagonal web members. This type of structure does not require any intermediate support inside the building, which allows for an open interior space (without roof-supporting columns), enabling free design and arrangement of rooms.

When is it worth using roof trusses?

The use of roof trusses also allows for cost and construction time reduction, as the bottom chord of the trusses serves as the ceiling structure for the building’s ground floor. This solution enables simultaneous construction of both the roof and the ceiling structure. In the case of traditional roof frameworks, the ceiling is made as a reinforced concrete or prefabricated system, which extends the construction time and increases costs.

Prefabricated roof trusses are more economical, easier and faster to install, and they are effective in complex roof layouts. Trusses require about 35% less material than traditional frameworks for the same area. The installation of roof trusses takes one day for simple gable roofs, and up to three days for more complex structures.

For what type of buildings are roof trusses suitable?

Roof trusses are most commonly used in the construction of single-family homes – both masonry and wooden frame structures. Prefabricated trusses are also used in large-volume buildings, which eliminates the need for unnecessary support points in large spans. Trusses are ideal in situations where minimizing construction time is essential.

Example projects of prefabricated roof trusses

Get a quote for roof trusses

Would you like to receive a detailed quote for roof trusses tailored to your building? Send us the parameters of your planned building, and we will get back to you with an offer.

Get a quote for heating your building

Would you like to receive a more detailed offer? Describe what you’re interested in, and we will come back with a solution tailored to your needs.

E-MAIL

info@modularen.com

PHONE

+ 48 535 602 351
+ 48 883 657 131

Address

Modularen Sp. z o.o. ul. Puławska 228/1 02-670 Warszawa

Attach the necessary documentation for the analysis of your plot. You can also send the materials to our email address: - info@modularen.com

To carry out the analysis, we will need one of the two documents listed below:
- Floor plan of the storey directly under the roof (for single-storey buildings this is the ground floor plan)
- Roof plan
- Building cross-sections
Płyta fundamentowa 35m2

Foundation Slab – When to Use It and How to Build It [2025]

What is a foundation slab?

It is a type of foundation that does not require deep excavation or extended drying times. The foundation slab provides a solid base for the future building. It is insulated from the ground across its entire surface using extruded polystyrene (XPS).

Reinforcement and concreting are also done over the entire area, unlike traditional foundations where footing trenches are made only along the perimeter of the building. In energy-efficient and passive construction, the foundation slab has become the standard.

Just like with traditional foundations, the function of the slab is to transfer the weight of the building to the ground. The foundation slab performs this task more effectively because the building’s weight is distributed across the entire surface of the slab, rather than linearly along the outer footings as is the case with traditional foundations.

Need a quote for a foundation slab for your project?

Foundation Slab vs. Traditional Footings – Which to Choose?

Investors often choose traditional foundations hoping they will be cheaper. It’s true that traditional footings require less material. Naturally, this translates to savings. However, a foundation slab requires insulation, reinforcement, and concrete across the entire surface, which involves higher material costs. But total cost calculations should also consider the time needed to complete the foundation and therefore the labor cost. A foundation slab can be completed much faster, reducing labor expenses. Although materials for footings are cheaper, the work is more labor-intensive, leading to higher labor costs.

A slab foundation of approx. 100 m² can be completed in 3–5 business days. In contrast, footings and foundation walls take 2–4 weeks, depending on weather and crew organization. Regardless of speed, open trenches pose a risk of flooding, which requires pumping out water and drying, both time-consuming and costly. A slab minimizes this risk by allowing excavation and backfilling in a single day.

In the long term, beyond comparing construction costs or pace, it’s essential to consider potential heat loss through the foundation. Slab foundations are insulated on the entire surface, unlike footings which are only insulated around the perimeter and filled with uninsulated lean concrete. For this reason, energy-efficient and passive houses are almost exclusively built on slab foundations.

Further Features of the Foundation Slab

Slab foundations offer much more effective thermal insulation and can be built above the groundwater level. Traditional foundations must be placed below the frost line (approx. 80–140 cm in Poland). Slabs do not require such depth because they are fully insulated from the ground using XPS. It’s sufficient to remove the topsoil (30–50 cm) and replace it with non-frost-susceptible material (e.g., sand-gravel mix), then compact it. This reduces excavation work and helps in areas with high groundwater levels.

Concrete in a slab dries quickly—just 7–14 days—allowing house construction to begin. Traditional foundations dry for 21–28 days. Moreover, the slab evenly distributes building load across its surface. On weak soils, slabs are far superior, preventing uneven settlement and potential wall cracking. Radiant heating can be installed directly in the slab or integrated during pouring. These advantages accelerate construction, simplify coordination, and reduce overall costs.

When Should Traditional Footings Be Used?

Footings use less material, which saves money. But the process is more labor-intensive. If you have access to a low-cost construction crew—or plan to do the work yourself—footings might be more cost-effective. However, footings require thicker insulation later during the floor slab phase, which adds cost that’s not included in the footing estimate. In slabs, insulation is already included, possibly allowing for a thinner (or no) additional insulation layer.

What Does a Foundation Slab Cross-Section Look Like?

A professional slab design must be prepared by a licensed structural engineer, based on building parameters and soil conditions. In our projects, the slab surface is 20 cm below the final floor level. To enhance insulation and reduce thermal bridges, we apply additional insulation in the screed, which is 12 cm EPS + 6 cm concrete screed + 1.5–2 cm tile/panel.

Example standard slab cross-section (used in Modularen homes):

  • Watertight concrete B25 W8, 200 mm thick
  • Plumbing according to design
  • Double steel mesh reinforcement, Ø8 mm bars
  • Horizontal XPS insulation, 100 mm thick, 300 kPa
  • Perimeter EPS Hydro insulation, 100 mm thick, 150 kPa
  • Mechanically compacted sand-gravel mix, 200–300 mm
  • Native soil

How to Begin Work on the Foundation Slab?

The next part of the article presents the general steps for slab construction. These are only guidelines; each slab must be designed based on individual ground conditions and building specs. Always consult your contractor and structural engineer.

1. Geotechnical Survey – Why Is It Necessary?

Before starting work, determine the soil type. If buying land, test the soil before purchasing. Soil composition affects earthwork scope and cost. Peat or clay may require soil replacement down to 1.5–2.0 m and advanced drainage. Sand is ideal and requires minimal replacement. Early testing can save tens of thousands of złoty.

2. Building Layout – How to Mark It?

Use the same surveyor who created the base map. They can also mark utility lines. The layout should use string line frameworks (wooden structures with pulled wire). Marking the outer edge of the slab, including insulation thickness, will ease future work. Avoid using wooden stakes alone—they will be removed during excavation.

3. Soil Replacement – How to Prepare the Ground?

Remove topsoil (30–50 cm). If the subsoil is sand, you can proceed. If it’s clay or peat, deep replacement (up to 2 m) may be needed. This raises costs. For proper estimation and planning, a geotechnical survey is essential.

Assuming sand is found, bring in and compact sand-gravel mix using a plate compactor. If the slab level has not yet been set, determine it now. It should be 20–40 cm above ground level to protect against flooding and simplify landscaping.

4. Insulation from the Ground – How to Insulate the Slab?

Place perimeter formwork and insulation using prefabricated elements joined with metal connectors. Apply foam at joints. Install utility conduits according to design. Lay XPS insulation in two layers, offset, to prevent thermal bridging. Consult the engineer to select proper load-bearing XPS (e.g., 300 kPa).

5. Reinforcement – How to Install It Properly?

Follow the engineer’s drawings exactly, including reinforcement mesh density, bar diameter, stirrup placement, etc. Install double mesh separated with spacers. After this, install plumbing and possibly heating (if no screed will be added later). Pressure test the system.

6. Concreting the Slab – Key Considerations

Concrete thickness is dictated by the height of perimeter elements (e.g., 20 cm of B25 W8 concrete). Order concrete from a local plant. Distribute evenly, using a level, and compact with a vibrator to eliminate air pockets. After initial set, mechanically smooth the surface.

7. Concrete Screed for Terrace – Why and How to Build It?

If your house includes a wooden terrace, consider pouring a concrete base now. The process is similar but uses less material. One layer of reinforcement and 10 cm of concrete will suffice. Remember to provide a 1–2% slope for water runoff. A concrete base prevents weed growth and provides stability.

What Is the Cost of a Foundation Slab?

The final cost depends on:

  • Terrain complexity
  • Total area
  • Slab shape
  • Concrete volume
  • Material assumptions (e.g., rebar diameter, insulation thickness)

For a detailed quote, complete the form and send your slab structural design. Our slabs are built by one trusted team across Poland. We offer full quality guarantees.

Request a quote for your foundation slab

Want a tailored offer?

Let us know your needs, and we’ll get back to you with a custom

E-MAIL

info@modularen.com

PHONE

+ 48 535 602 351
+ 48 883 657 131

Address

Modularen Sp. z o.o. ul. Puławska 228/1 02-670 Warszawa

Attach the necessary documentation for the analysis of your plot. You can also send the materials to our email address: - info@modularen.com

To carry out the analysis, we will need one of the two documents listed below:
- Local Development Plan (MPZP) along with the attached zoning map
- Individually issued Building Conditions (WZ)
Ogrzewanie na podczerwień - Folia grzewcza pod panele podłogowe

Infrared Heating – Costs, Advantages, Disadvantages [2025]

What is infrared heating and how does it work?

Infrared heating involves the movement of electromagnetic waves through radiation. Infrared energy emits heat through the absorption of waves by living organisms or objects.

In practice, this means that waves are converted into heat upon contact with any surface. This process is independent of air, which ensures even heating throughout the room. 

In contrast, traditional heating systems rely on air as the heat carrier, which naturally rises when warmed. With traditional radiators, the temperature between the floor and ceiling can differ by 5–10°C. This phenomenon does not occur with infrared radiation, as it emits waves evenly, which is why heating foils can also be installed in ceilings.

Infrared heating is typically provided by heating foils/mats. These foils are about 0.5 mm thick. The most important component is a fabric made of carbon fibers and carbon paste, which acts as the heating element.

The heat produced by the foil warms the floor, walls, and ceiling, which in turn emit heat into the room. In other words, the air is heated by the warmed objects.

Need a quote for a heating system for your investment?

Is infrared heating healthy?

Heating foils use so-called far infrared (FIR) radiation ranging from 25–1000 μm. FIR is generated due to electrical resistance in a material approximating a perfect black body. Such a material is pure carbon, used in the thin heating matrix printed onto the heating foil. This construction is entirely harmless to the human body. Moreover, FIR is even used in medicine.

Far infrared is also present in traditional tungsten light bulbs. Though now less common, we were all exposed to them for decades without any health effects. Infrared is also used in therapeutic chambers, saunas, and heating tunnels – all commonly found in modern SPA & Wellness centers. Infrared therapy is widely used in rehabilitation and muscle tissue regeneration, especially for athletes where speed and quality of recovery are critical.

Infrared rays penetrate the skin and reach subcutaneous tissue cells. Once there, they enhance lymphatic and blood circulation, supplying the body with nutrients and stimulating the immune system to fight diseases.

What are the average monthly costs of infrared heating?

The cost of infrared foil heating depends on the home’s insulation, window tightness, size, location, and electricity prices, which have recently been highly variable. It’s therefore difficult to provide an exact cost without specific guidelines.

As an example, take our prefab timber-frame house Prime House 54, with a footprint of 35 m² and a total area of 51 m². This house meets 2021 technical requirements, which mandate low thermal transmittance (U-values) for walls, roofs, windows, and doors. The lower the U-value, the lower the heat loss. Considering all these parameters, the average heating cost for year-round use during the heating season is about PLN 180–255/month.

As of November 2022, infrared foil manufacturers suggest assuming a cost of approx. PLN 3.5–5.0/m² of usable floor area. For a 120 m² building, this means an average monthly cost of PLN 420–600 during the heating season.

Ceiling or floor heating – how to choose?

Ogrzewanie na podczerwień bazuje na emisji fal, które odbijając się od przedmiotów generują ciepło. Tak jak słońce, które jest największym naturalnym promiennikiem podczerwieni. Słońce wysyła do nas fale z bardzo daleka, które nagrzewają przedmioty napotkane na swojej drodze. Podobną analogią należy kierować się chcąc zrozumieć sposób działania folii na podczerwień.

In floor heating, this layer could be screed, tiles, boards, or panels. In ceiling heating, it would be the ceiling panel. In all cases, heat is emitted by the first material layer.

Therefore, floor heating is the default solution since heat naturally rises. Ceiling foils can be useful in small rooms with limited floor space (e.g., a small bedroom with a double bed) or in buildings where the floor is already finished. Installing ceiling foils and covering them with plasterboard is easier and cheaper than removing the entire floor.
When building a new house with normally sized rooms, floor heating is generally more efficient and comfortable, especially when using floor tiles. Nobody likes walking on a cold floor!

How to install infrared heating – foils or heating mats?

Infrared electric heating can be installed using either foils or heating mats.

  • For floor panels, heating foils can be laid over the screed or on OSB/MFP boards (e.g., in attics). Panels are installed as floating floors, not glued down.
  • For tiles, foils (made of PET plastic) cannot be directly tiled over. Instead, install the foil under the screed on insulation (e.g., polystyrene). This creates an accumulation system, allowing tiles to be laid on top.
  • Always install a temperature sensor for each heating zone. Divide zones room by room and use separate thermostats for each.

If screed embedding is not possible, heating mats are the alternative. These are electric cables embedded in fiberglass mesh, laid in strips. Mats are suitable for tiled areas: bathrooms, hallways, kitchens, technical rooms, etc.

Mats are laid on screed or boards. Don’t forget the temperature sensor. You can then tile directly over them. Cable diameter: approx. 3 mm. Including tile and adhesive: leave about 20 mm for installation.

Mats are also thermostat-controlled, allowing zoned heating.

Advantages of infrared heating:

  • Easy to install, maintenance-free, and reliable;
  • Space-saving: only 0.5 mm thick, hidden in floor/ceiling/walls;
  • High thermal output = rapid surface heating;
  • Uniform heat distribution;
  • Remote control via Wi-Fi apps – great for rental or occasional use;
  • Low installation and operating costs vs. traditional heating or heat pumps;
  • No air movement – less dust = ideal for allergy or asthma sufferers;
  • Eco-friendly, especially when combined with photovoltaics;
  • Warm walls reduce moisture and mold risk.

Disadvantages of infrared heating:

  • Infrared foils do not heat water – separate water heater needed;
  • In poorly insulated older buildings, power demand and costs rise;
  • Installation in existing buildings may require floor removal and electrical adjustments;
  • Electricity price volatility affects operating costs.

Koszt instalacji folii na podczerwień

To receive a detailed cost estimate for materials and installation, please fill out the form below. With full building specifications, we can provide an accurate quote.

Heating foils/mats in our homes are supplied and installed by a trusted partner, ensuring quality and full warranty. If you wish to work with our specialists, we offer installation services throughout Poland.

Get a Heating Quote

Looking for a tailored offer? Tell us what you’re interested in, and we’ll respond with a personalized solution.

E-MAIL

info@modularen.com

Phone

+ 48 535 602 351
+ 48 883 657 131

Address

Modularen Sp. z o.o. ul. Puławska 228/1 02-670 Warszawa

Attach the necessary documentation for the analysis of your plot. You can also send the materials to our email address: - info@modularen.com

To carry out the analysis, we will need one of the two documents listed below:
- Local Development Plan (MPZP) along with the attached zoning map
- Individually issued Building Conditions (WZ)
Dom bez pozwolenia 35m2 z antresolą

House without a Building Permit – Everything You Need to Know [2025]

What do the regulations say, and what are the rules for constructing houses without a building permit?

Since 2015, under the Building Law Act, individual recreational buildings with a footprint of up to 35 m², measured along the building’s perimeter, can be constructed based on notification alone.

However, as of January 3, 2022, this act was extended to allow residential houses up to 70 m² to be built without a permit. The scope of the act depends on the intended use of the building.

This article explains the current regulations in force since 2022.

Szukasz gotowego projektu domu prefabrykowanego bez pozwolenia na budowę? Pobierz darmowy katalog

Pobierz pełną ofertę

Pozostań z nami w kontakcie i pobierz katalog zawierający wszystkie nasze projekty ze szczegółowymi cennikami.
Dom prefabrykowany - Rest House 87:12

Single-Family Residential Building up to 70 m² under the "No Formalities House" Program – Procedure, Requirements

Key requirements for constructing a single-family residential house:

  • The notification application must include a building design and concern a building with a footprint up to 70 m², which may have a habitable attic. The building may be two stories, since, by law, an attic with habitable rooms is considered a storey.
  • The construction must comply with the Local Development Plan (MPZP), or, in its absence, a decision on building conditions (WZ) must be obtained. Previously this took several months; as of 2022, WZ is issued within 21 days.
  • The area of impact of the building must be entirely contained within the plot(s) where it is designed.
  • The law does not waive compliance with technical and construction requirements specified by regulations—such as setback distances from property lines.
  • Houses built on the basis of notification with project documentation are exempt from waiting for approval. The office does not verify the submitted project. As a result, after submitting documents, construction may begin immediately by notifying the building inspectorate. By comparison, building permits take 65 days for approval.
  • For homes intended to meet personal housing needs, the investor is obliged to:

o Notify the building supervisory authority and the project designer about the start date of works;

o Perform geodetic site staking and, after construction, as-built geodetic inventory.

  • The investor must include:

o A site plan,

o An architectural and construction design with annexes,

o A statement declaring the house is for personal housing purposes,

o A statement of legal title to use the property for construction,

o A statement assuming responsibility for site management if no site manager is appointed.

  • In summary: building a home on notification differs little from full-permit construction. You still need a building design, which in the case of custom projects may take months and require multiple specialists. A custom project usually starts from PLN 10,000. Even with a ready-made design, adaptation to local conditions and land may take 1–3 months.

While the law does not require a site manager (saving PLN 2,000–4,000), this may not be beneficial. The manager ensures compliance with regulations, proper execution, and contract terms. Without construction knowledge, oversight can be difficult. The investor assumes full liability in the absence of a manager.

Individual Recreational Building up to 70 m² – Procedure, Requirements

Requirements for individual recreational buildings:

  • Must be single-storey, detached, with a footprint not exceeding 70 m². A usable attic is not allowed, but an open mezzanine is permitted.
  • Must comply with the MPZP, or, if none exists, WZ must be issued.
  • Only one house per 500 m² of plot is allowed.
  • Minimum ceiling height: 2.2 m.
  • Span of structural elements: max. 6 m; cantilever projection: max. 2 m.
  • These structures are temporary-use buildings and should not be inhabited for more than 180 days per year.
  • The plot does not need to be connected to utilities (water, sewage, electricity, heat), unless required in the MPZP or WZ.
  • The building does not have to serve personal housing needs—it can be rented, sold, or multiplied (1 unit per 500 m²).
  • These buildings are exempt from energy performance requirements, fire resistance, and thermal insulation standards. Therefore, construction materials and methods must be chosen carefully, as many contractors use inferior materials that the law does not regulate.

In summary, recreational buildings can be built without a full building design. The procedure is much simpler than for residential buildings: a simple notification form, a site map with the building drawn, and basic elevation sketches are sufficient. Documents can be gathered within a few days. After submission, wait 21 days—if no objections arise from the office, silent consent is granted, and work can begin.

Can a Recreational Building Be Used Year-Round?

Theoretically no. Practically yes. The law specifies that such buildings are for temporary use, with no clear regulation on registration of residence. Some offices allow it; others reject it.

The limit is 180 days per year, which can be used continuously or spread across the year. Rental is allowed.

While not required, the house can still be insulated and usable year-round. Most 35 m² homes on the market are poorly insulated and only suitable for summer. At Modularen, our homes meet WT2021 technical standards and can also be constructed with full building permits. Our houses meet all thermal transmittance (U-value) standards and minimum 2.5 m ceiling height, just like residential buildings. One such design is the Rest House 66, which includes full project documentation.

Conclusion: If you want to use the house in winter, carefully evaluate technology and materials.

Can a Recreational Building Be Converted to a Residential One?

Yes. You may build as a recreational house using the simplified process, then later apply to reclassify it as residential.

However, it must already meet all technical requirements of a residential home: 2.5 m ceiling height, proper insulation, compliant stair dimensions, etc. This is convenient because the formalities can be handled after construction, without time pressure.

Is a Building Design Required?

  • Residential house up to 70 m²: YES – building design required.
  • Recreational house up to 70 m²: NO – design not required, but basic structural calculations are strongly advised.

How to Notify Construction of a Recreational House up to 70 m²?

Notification is submitted to the Architecture and Construction Department at the County Office or City Hall. The process is simple:

  1. Request a cadastral map (1:1000 scale) from the Geodesy Department (cost: ~PLN 17).
  2. Obtain the notification form and ownership statement (available online or at the office).
  3. Ask your contractor for floor plans, cross-sections, and elevations.
  4. On the map, draw the building footprint, respecting setback regulations. Check these with an architect, as they depend on façade materials, windowed walls, and proximity to roads.
  5. Submit the completed documents with the map and drawings. Provide a contact number for corrections if needed.

6. If there’s no response within 21 days, silent consent applies, and you can start construction.

What Else Can Be Built Without a Permit?

  • Detached single-storey utility buildings (e.g., garages, gazebos) up to 35 m² (max. 2 per 500 m²).
  • Open carports up to 50 m² (1 per 500 m², only on plots with a house).
  • Ground-level terraces up to 35 m².
  • Domestic wastewater treatment systems (up to 7.5 m³/day).
  • Sealed sewage tanks up to 10 m³.
  • Garden ponds and swimming pools up to 50 m².
  • Underground cable ducts.

Sources:


https://www.biznes.gov.pl/…proc_550-zgloszenie-budowy-lub-innych-robot-budowlanych

https://isap.sejm.gov.pl/isap.nsf/download.xsp/WDU20210001986/O/D20211986.pdf

Contact Us

Looking for a tailored offer? Tell us what you’re interested in, and we’ll respond with a solution.

E-MAIL

info@modularen.com

Phone

+ 48 536 838 863
+ 48 535 602 351

Address

Modularen Sp. z o.o. ul. Puławska 228/1 02-670 Warszawa

Działka budowlana

Building Plot – How to Buy and Not Lose Money? [2025]

Building a house is a major challenge—one that we usually face only once in a lifetime, and most often without any prior experience. Taking on such a serious task requires preparation and knowledge. Only knowledge can protect us from poor decisions and, as a result, from losing money invested in land on which little or nothing can be built.

One of the first questions to answer concerns the building plot itself—specifically, what characteristics it should have. Below are the key aspects that should be verified before making a purchase.

Is the plot covered by a Local Development Plan (MPZP) or issued Building Conditions (WZ)?

The first step before purchasing a plot is to check the zoning regulations applicable to the land. If the plot is covered by a Local Development Plan (MPZP), you should visit the municipal office to review the applicable provisions.

The MPZP contains information such as land use designation, minimum plot size for building placement, the maximum buildable area, and the required green area. It also affects not only the volume of the house but also its appearance, often providing specific guidelines for roof shape and pitch, tile color, building height, and even fence design.

If no MPZP is in place for the area, you must consult the spatial development study and ideally apply for Building Conditions (WZ) before making a purchase. Whether and what kind of building can be constructed on a specific plot is determined solely by the MPZP or WZ. Without one of these documents, construction is not permitted.

If the plot is covered by the MPZP or has been issued WZ, you can then apply for a building permit or submit a construction notice. Even the simplest form of construction, such as notifying an individual recreational building, still requires either an MPZP or WZ document for review.

Note that land designated for single-family residential development is not the same as land for recreational buildings. Residential construction requires full permitting or formal notice with complete documentation, though no construction manager is required under the notice procedure. To use the least complicated and fastest procedure, the land must be designated for recreational or summer development. Similarly, to build a residential home, the land must be designated for single-family residential housing.

Is there access to a road, and what is its legal status?

While we rarely buy land without visiting it first—and since we were able to reach it—we may assume that the plot has formal access to a road. However, this is not always legally the case. It may turn out that the road passes through a neighbor’s land, in which case the neighbor has the right to charge for access or, worse, deny usage.

According to the Construction Law, every building plot must have access to a road. If no access is visible on the map, the authorities will not issue a building permit. It is possible to use a road through a neighbor’s land, but this requires the establishment of a road easement or a compulsory road.

The best-case scenario is when the plot has access to a municipal road. In such cases, the municipality is responsible for road maintenance, paving, snow removal, lighting, and general upkeep.

If the plot has no direct road access, you will have to consider one of the following options:

  • Establish a right-of-way (road easement),
  • Buy a shared ownership in a designated access road,
  • Purchase an adjacent plot that has public road access.

A land easement is based on Article 285 §1 of the Polish Civil Code, which allows a property to be encumbered for the benefit of another property’s owner, granting usage rights. Unlike a personal easement, a land easement is tied to the property, not the owner, and passes to each successive owner.

Such an easement can be established through a notarial agreement and registered in the land and mortgage register, or via court order (as a compulsory road). A compulsory road may involve fees payable to the landowner whose property the road crosses. Sometimes, obtaining such access is impossible due to the landowner’s refusal. That’s why it’s wise to discuss and formalize an agreement with the neighbor before buying the land.

Are utilities available, and what are the connection terms?

A fully serviced plot (with utility connections) is the most attractive—but also the most expensive. When buying unserviced land, you must check how far the water, sewage, electricity, and gas networks are from the plot (if planning to use gas). You can obtain this information from the municipal or county office, or by contacting utility providers directly for accurate cost and feasibility information.

If there is no access to the sewage system, the situation is manageable. Many investors forego a connection due to distance. Alternatives include installing a septic tank or a domestic wastewater treatment plant.

Connecting to the water network is more complicated but usually proceeds smoothly (within 3–6 months), depending on the distance to the main. The best case is when the water main is in the road by the plot. Then, a simple tap connection is made, and a water meter pit is installed on the plot. The total cost of this setup typically ranges from PLN 4,000 to 6,000.

If the water main is farther away, a dedicated water supply line must be built at a cost of PLN 200–400 per meter.

The most problematic issue is lack of electricity access. Even if a neighboring plot is connected, this doesn’t guarantee a quick hookup. Waiting time often exceeds six months, and energy providers typically quote up to 18 months in contracts—with delays not uncommon. In urgent situations, consider applying for temporary construction power, which is usually provided within 1–3 months, but is significantly more expensive than a permanent connection.

Are there surrounding features that require mandatory setback distances?

Owning a plot doesn’t mean you can freely place your building anywhere. There are many regulations to follow.

First, there are technical conditions defined by the Ministry, governing how buildings are designed and located. According to these regulations:

  • A building must be placed at least 4 meters from the boundary if the wall facing that boundary has windows or doors.
  • A 3-meter distance is required if the wall has no openings.

Exceptions allow buildings to be located 1.5 meters from the boundary, or even on the boundary, depending on local zoning plans (MPZP or WZ). This is also allowed for plots narrower than 16 meters.

Fire safety regulations may require additional setbacks based on construction technology. For example:

  • Two buildings with NRO (non-fire-spreading) walls should be at least 8 meters apart if they have windows facing each other.
  • If both buildings have blank walls on that side, a 6-meter distance is sufficient.
  • If either building is classified as RO (fire-spreading), such as with timber façades, the minimum distance increases to 16 meters, regardless of windows.
  • If one is RO and the other NRO, the minimum is 12 meters.

Additionally, there are setback rules from forests.

  • Detached houses up to 3 storeys and outbuildings/garages up to 2 car bays must be placed 4 meters from the forest boundary if it’s on a neighboring plot.
  • If the forest is on the same plot as the house, it may be placed at any distance.

However, such buildings must lack explosion-risk rooms and meet fire protection requirements. Otherwise, the minimum setback is 12 meters.

Is the plot located in a protected area?

This information can be found in the MPZP or local development study. This is very important, as protected areas often prohibit or heavily restrict construction—which, while burdensome, may be worth accepting for nature lovers.

In general, national parks and nature reserves prohibit residential development. An exception may apply if a plot lies within both a national park and a protected landscape zone—though this is rare.

Buffer zones around parks or reserves may allow construction, but with strict conditions that are often hard to meet.

Landscape parks usually prohibit multi-family or terraced housing, but often allow single-family homes or recreational buildings. These limitations are defined in provincial council resolutions. Be sure to check the protection plan of the specific park, which may affect both the location and design of your building. Even tree planting or removal, or mowing, may require approval.

Another restricted zone is the Natura 2000 area. Construction rules are detailed in protection plans issued by the Ministry of Environment, covering land use, building locations, infrastructure, afforestation restrictions, and water management. Environmental impact assessments are usually required before obtaining a building permit.

Historic or archaeological zones can also restrict building rights. If a monument is nearby or on the plot, additional supervision, extended timelines, and higher costs are expected.

For plots with shorelines, buildings must be set back at least 100 meters from the water.

Is the land suitable for construction?

Soil and water conditions significantly impact future construction. Some soils require special foundations, increasing costs, while others are unsuitable for building altogether.

Ideal soils are non-cohesive, such as sands or gravels, which are water-permeable and settle uniformly.

Cohesive soils, like clay or loamy sands, are less ideal—they retain moisture, are frost-susceptible, and may cause uneven building settlement over several years.

Worse are organic soils, like peat or mud, which deform easily and can “move” the building, causing cracks. Water in these soils is also acidic, negatively affecting construction materials.

Man-made soils (landfills) can also be problematic if not properly compacted.

Another important factor is the groundwater level. High levels may preclude basements or complicate foundation works. Excavations may require pumping and waterproofing, increasing costs.

Always conduct a geotechnical survey—mandatory for building permits. The cost is unavoidable, but early testing can save you from investing in unbuildable land.

How to perform a full technical analysis?

As shown, there is much to verify when purchasing a building plot. It is helpful to choose a house design in advance—knowing the building’s size, roof pitch, number of storeys, and façade type helps assess the plot’s suitability.

If you want us to perform a formal analysis of your plot, contact us. Our architectural team will review the MPZP / WZ against your house design, verify road access and legal status, and check if distance regulations permit construction. Cost of analysis is quoted individually.

Submit your plot for analysis

Want to be sure you can build your dream home on your plot? Send us the relevant documents, and we’ll provide a comprehensive assessment.

E-MAIL

info@modularen.com

Phone

+ 48 536 838 863
+ 48 535 602 351

Address

Modularen Sp. z o.o. ul. Puławska 228/1 02-670 Warszawa

Attach the necessary documentation for the analysis of your plot. You can also send the materials to our email address: - info@modularen.com

To carry out the analysis, we will need one of the two documents listed below:
- Local Development Plan (MPZP) along with the attached zoning map
- Individually issued Building Conditions (WZ)
Płyta OSB

MFP or OSB board – which one to choose?

One of the key elements in planning construction or renovation work is the choice of structural panel. Among the most commonly used panels for reinforcing structures are MFP (Multi-Functional Panel) and OSB (Oriented Strand Board). Both materials have unique characteristics and applications, which makes the decision more complex than it might seem. Below is a comparison of their most important parameters.

Applications of OSB and MFP boards

MFP board is a type of multifunctional engineered wood panel, known for its high strength and resistance to moisture. It consists of thin wood layers arranged in different directions, which ensures uniform strength in all dimensions. MFP boards are often chosen for projects that require good resistance to external conditions and mechanical loads. They are frequently used in the construction of timber frame houses, as well as for reinforcing roofs or floors in masonry buildings.

OSB board, on the other hand, is a type of chipboard produced from long, thin wood strands arranged in layers and bonded together under high temperature and pressure. OSB boards are somewhat less strong and rigid than MFP boards, but they are also less expensive. Like MFP boards, they are commonly used in construction work, such as wall, roof, and floor reinforcement, especially in attics or suspended ceilings.

Waterproofing of structural panels

In timber and frame construction, two major threats can be identified – water and fire. Excess moisture, especially when it persists inside the structure for a long time, can have a very negative impact on the wood. For this reason, structural panels are typically covered with additional protective materials, such as vapour barrier membranes. However, it’s important to remember that these membranes cannot fully protect the structure from moisture penetration; they only reduce its ingress.

It should also be noted that laminated panels such as MFP and OSB are characterized by high diffusion resistance, meaning they act as vapour barriers themselves. Because of this, in timber frame houses, these boards must not be used on the external side of the structure. If moisture penetrates into the structure and the panels are installed on the outer side, they will prevent the moisture from escaping, which can cause it to remain trapped inside the wall or roof, ultimately leading to the degradation of the structure.

Therefore, MFP and OSB boards should always be used on the interior side of walls. MFP boards are significantly more resistant to moisture than OSB, which makes them a better choice for areas such as bathrooms or kitchens.

Fire Resistance of MFP and OSB Boards

As previously mentioned, fire is the second major threat to timber-based structures. Therefore, material selection in this case should be based on a parameter known as reaction-to-fire class.

  • MFP boards are classified as D-s1, d0, which means they make a significant contribution to fire, produce almost no smoke during combustion, and do not emit flaming droplets or particles during a fire.
  • OSB boards are classified as D-s2, d0, indicating a significant contribution to fire, moderate amount and density of smoke, and no emission of flaming droplets or particles during combustion.

In general, MFP boards meet fire protection requirements better than OSB boards in classes OSB1 through OSB4.

However, it is worth noting that the market offers special fire-resistant OSB boards, such as OSB STOP FIRE, intended for use in applications where increased fire protection is required.

Structural Rigidity

Due to their higher density, MFP boards have significantly greater cohesion and stiffness. They outperform OSB boards in terms of bending and tensile strength by approximately 122%, both along the longitudinal and transverse axes.

Furthermore, MFP boards offer twice the level of flexibility in the transverse axis compared to OSB boards.

In summary, MFP boards bear loads more effectively, reinforce structures more efficiently, and generally perform far better in terms of structural static parameters.

Formaldehydes in OSB and MFP Boards

Formaldehydes are widely used industrial chemicals. Their presence in building materials poses a health risk—inhaling their vapors can cause irritation of the respiratory tract, skin, and eyes.

In the manufacturing of OSB boards, specialized adhesives play a key role. These adhesives contain various types of synthetic resins such as melamine-formaldehyde, urea-formaldehyde, and phenol-formaldehyde. Consequently, formaldehyde is a key reagent in the synthesis of these resins.

During the production process—especially the hot pressing stage, where glue-soaked wood strands are compressed at temperatures up to 200°C—partial depolymerization of the resin occurs, which causes the majority of the formaldehyde to evaporate. Only trace amounts remain in the final OSB board. It is estimated that formaldehyde emissions can be detectable for approximately 1 to 3 months after production.

MFP boards, like other engineered wood products, are also bonded using adhesives; however, the adhesives used for MFP boards contain negligible amounts of formaldehyde. As a result, MFP boards comply with the E-1 emission class standard, meaning that harmful substance emissions are limited to less than 0.1 mg/m³.

According to the standards set by the Polish Institute of Occupational Medicine, the maximum permissible concentration of formaldehyde in the workplace is 0.5 mg/m³ over an average 8-hour workday.

It is worth emphasizing that, although the adhesives in engineered wood products may contain formaldehyde, the amount present in MFP boards is minimal—much lower than in some hair care products or in chipboards used to manufacture kitchen furniture, cabinets, or dressers—not to mention cigarette smoke.

Price – Which Is Cheaper: OSB or MFP?

  • The price of an MFP board with dimensions 1250 x 2500 mm, thickness 12 mm, is approximately 29 PLN per m².
  • The price of an OSB board with the same dimensions and thickness is approximately 18 PLN per m².

Dimensions of OSB and MFP Boards

The typical length of both MFP and OSB chipboards is 2500 mm, while their width ranges from 605 to 1250 mm.
Both MFP and OSB boards are available in various thicknesses: 10, 12, 15, 18, 22, or 25 mm.

  • The most commonly used thickness for wall reinforcement is 12 or 15 mm.
  • A thickness of 22 or 25 mm ensures exceptionally high bending strength under constant and operational loads, which is why such boards are recommended for flooring applications.
Drewno konstrukcyjne - C24 : CLT : BSH : KVH

Structural timber – which type should you choose?

Structural timber is used for creating load-bearing and structural elements such as beams, posts, floors, rafters, or building frames. It is one of the oldest building materials, which remains indispensable to this day in many construction projects, both traditional and modern.

Structural timber – what are its characteristics?

Structural timber is a naturally sourced material that combines the durability and strength of a construction-grade building material. Of course, it is processed timber that has been treated in a way that enables it to meet specific standards and requirements necessary in construction for forming load-bearing and structural components.

It is characterized by excellent mechanical strength, allowing it to carry significant loads, as well as resistance to weather conditions, especially when appropriate protection methods such as impregnation or drying are applied. Structural timber is also valued for its insulating properties, which contribute to improving the energy efficiency of buildings.

In construction, structural timber with a strength class of C24, as defined by European technical standards such as PN-EN 338, is most commonly used. In practice, this means that a C24-class wooden element meets the requirement of bending strength of 24 MPa per 1 mm². Translated into more illustrative terms, we can say that 1 cm² of structural timber can withstand a load of 240 kilograms.

In order for structural timber to be certified, it must undergo a series of thermal processing and quality testing procedures. First and foremost, for the material to undergo the certification process, it must be dried, after which the timber’s moisture content reaches between 15% and 18%. Next, the material is subjected to four-sided planing and edge chamfering, which results in its sides and edges being smooth, free of splinters and sharp elements. After such processing and quality control, a certified grader with the appropriate qualifications classifies the product as load-bearing, thereby making the timber a structural material that receives the CE certificate. The certification process is strictly described by relevant standards, and the final product bears a stamp on each batch of material.

What tree species is structural timber made from?

Structural timber used in construction can come from various tree species. The choice of a specific species depends on the required physical and mechanical properties as well as local availability. However, the most commonly used structural timber comes from pine and spruce.

Pine is one of the most commonly used species of structural timber. Its popularity is due to its wide availability, high bending strength, and relatively low cost. Pine is lightweight yet offers good resistance to both bending and compression.

Spruce, like pine, is widely used in wooden structures. It is characterized by its lightness and ease of processing. It is chosen for its insulating properties and attractive appearance.

In wooden construction, products made from other tree species can also be found. However, these are most often used for finishing and decorative purposes rather than as structural material. Such species include:

Oak is a tree synonymous with strength, durability, and resilience. It is a hard and dense wood, most commonly used in the construction of self-supporting staircases. Its hardness and density also make it resistant to mechanical damage.

Fir is valued for its simplicity and uniform structure. It also has good insulating properties and is often used in roof structures and the production of boards and panels.

Larch, on the other hand, stands out for its high resistance to weather conditions and decay, which makes it frequently used in outdoor structures such as terraces, cladding boards, façades, or garden constructions.

Douglas fir is a hard and very durable type of wood. It is chosen for structures with high strength requirements.

Maple, beech, and ash are less common types of wood. These are deciduous species known for their exceptional aesthetic qualities. They are hard and durable, and sometimes used in specialized structural applications. Undoubtedly, they are more expensive than their coniferous counterparts. However, they feature a low number of knots, contributing to their minimalist and elegant appearance. These types of wood are most often used in places where the structure, grain pattern, and visual effect of the material are of the highest importance.

Planed or unplaned structural timber?

When choosing timber, one may also come across the terms planed structural timber and unplaned timber. What do they mean?

Unplaned timber refers to a type of wood that, after cutting and processing, does not undergo any additional surface treatment. This kind of raw material is not permitted for the construction of structural buildings. It remains in its natural state, with visible marks of machine processing. As a result, the surface is rough and contains visible splinters. Undoubtedly, it is a cheaper material (the technological process is less demanding). However, due to its uneven surface, it is most commonly used in constructions where the aesthetics and geometry of the material are of little importance (e.g. formwork boards for foundations, boards for ceiling formwork).

It should be noted that unplaned timber is not classified as structural timber. This means that the raw material has not undergone sufficient thermal processing and does not meet the moisture content range of 15–18%. Consequently, such timber is prone to drying out, twisting, geometric deformation, and cracking.

Planed timber, as the name suggests, undergoes an additional treatment process in which its surface is smoothed. In the vast majority of cases, if timber is planed, it is also properly dried and classified as a structural material. The planing process not only improves the appearance of the timber but can also affect its dimensions and usability. It is worth noting that planing allows for precise dimensioning of timber, which is important in projects requiring high accuracy. Additionally, the smooth surface limits moisture absorption and makes the timber more difficult to ignite, as fire tends to slide along the surface without catching easily. As a result, planing significantly increases the lifespan and durability of the wood.

Types of Structural Timber – C24, KVH, BSH, LVL

Another term you may encounter when choosing structural timber is its industry abbreviation, which usually relates to the timber’s cross-section. This may refer to Scandinavian, Canadian, or German (KVH) profiles, or laminated timber with a much more varied cross-section. So, what distinguishes these materials?

  • Canadian Profile – this is a timber frame construction system characterized by the use of wall, floor, and roof structures built with timber posts measuring 38 mm (1.5 inches) thick. This technology uses the smallest possible cross-section of structural timber, which is why it is referred to as a lightweight frame system.
  • Scandinavian Profile – structural timber with a post thickness of 45 mm and standard post widths increasing in 25 mm increments. These are the following dimensions: 45×45 / 45×70 / 45×95 / 45×120 / 45×145 / 45×170 / 45×195 / 45×220 / 45×245 mm. Scandinavian profile timber typically comes in the standard strength class C24 and is most commonly used in Scandinavian countries such as Norway, Sweden, Denmark, and Finland.
  • German Profile (KVH) – this abbreviation comes from the German term Konstruktionsvollholz. As the name suggests, KVH timber is most commonly used in Germany. Due to its robust nature, it is colloquially referred to as “heavy German frame.” KVH timber is also a structural material, planed on all four sides, with a moisture content of 15–18%, and has a bending strength class of C24 (meaning it withstands a bending force of 24 MPa per 1 mm²). However, it is characterized by the largest available cross-section on the market, with a post thickness of 60 mm and widths increasing in 20 mm increments. Additionally, KVH timber is finger-jointed along its length, which allows it to be sold in lengths up to 13 linear meters (while standard solid timber with Canadian or Scandinavian cross-sections is available in lengths up to 6 meters). KVH timber is available in the following cross-sections: 60×100 / 60×120 / 60×140 / 60×160 / 60×180 / 60×200 / 60×220 / 60×240 / 60×260 mm.

In addition to the three solid timber profiles described above, the market also offers laminated materials – BSH / CLT / LVL – which are characterized by much larger cross-sections, as they are laminated in layers. As a result, it is possible to produce beams with very large dimensions. Thanks to the lamination process, these products exhibit better geometric stability, improved visual properties (e.g. BSH-SI, CLT), and are less prone to delamination and cracking over time. Consequently, these materials are often used as exposed structural elements, left uncovered to emphasize their decorative qualities. Massive constructions made from such timber are typically used for high-load-bearing structural components with wide spans – such as girders, ridge beams, floor beams, posts, and the like.

Applications of Structural Timber

Structural timber is a fundamental material used in the construction of timber frame houses, which are gaining popularity due to their quick assembly, energy efficiency, and adaptability to the individual needs of the user. In this type of construction, timber elements form the structural framework of the house, which supports the entire building and whose cavities are filled with insulating materials. Structural timber is used for the production of posts, beams, rafters, and other load-bearing elements.

Roof trusses are another example of structural timber applications. In this case, timber forms the roof framework, ensuring its stability and resistance to loads such as the weight of the roofing, snow, or wind. Due to its resistance to bending and compression, structural timber is an ideal material for rafters, battens, and other structural roof components. It is worth noting that regardless of the technology used to build the walls of a structure, the final topping-out element — the roof — is, in the vast majority of cases, made from structural timber.

Structural timber is also used in the production of roof trusses, which are prefabricated structural elements enabling the quick and efficient construction of roofs with complex geometries. These are typically produced in factories and delivered to the construction site ready for assembly. The use of structural timber in the production of trusses guarantees a lightweight structure while maintaining high strength and durability.

Structural timber also plays an important role in landscape architecture, where it is used for building pergolas, gazebos, terraces, pathways, fences, and other small architectural elements. Its natural aesthetics, ease of processing, and resistance to weather conditions (especially when properly treated with protective agents) make it a popular choice for creating cozy and functional outdoor spaces.

Prices of Structural Timber

The prices of structural timber can vary significantly depending on several factors, such as the wood species, its quality, dimensions, as well as regional availability and transportation costs. Generally, structural timber prices are determined by its durability, resistance to external factors, and aesthetic qualities.

The cheapest types of structural timber are usually those most readily available locally. In many regions, these are softwoods such as pine or spruce, which grow quickly and are easy to process. Pine and spruce timber is often chosen for standard constructions not exceeding four storeys and designed to bear loads within the normal wind and snow load requirements in Poland. These types are most commonly used in residential construction, particularly in the building of single-family homes.

Laminated timber, which is characterized by the highest bending resistance and the ability to carry large loads — and therefore most often used in massive structures — is at the same time more expensive than standard solid wood. Laminated timber is also most commonly made from pine or spruce, but thanks to the layered gluing process, it features better geometric stability and enhanced visual characteristics (e.g., BSH-SI, CLT), and is therefore less prone to cracking. As a result, it is a visible building material that is not covered by other cladding materials, which increases its price but also gives it a decorative function.

Hardwoods, such as oak, beech, or ash, are usually more expensive than softwoods due to their hardness, durability, and longer growth time, which leads to higher production costs. Moreover, exotic wood, which must be imported, is typically significantly more expensive than local wood species — not only because of transportation costs but also due to its limited availability and highly desirable aesthetic or strength properties. Exotic timber is generally used in smaller quantities and applied in decorative building elements and interior finishes, such as stairs, benches, terraces, and facades.